

How To Hike Sentinel Dome: The Best Yosemite Sunset Photography
Watching the sunset on Sentinel Dome is one of the most surreal experiences in Yosemite. The best part is that it doesn’t involve a long hiking journey to get there.
After basking in this amazing sunset, we were convinced that the best sunsets in Yosemite are found above the valley. That way, you get an unblocked and even panoramic view of the High Sierras scenery.
If you’re looking for a great place for sunset photography, or the perfect place to make your wedding proposal, this article is just for you. I will be sharing about our experience on this sunset hike to Sentinel Dome, and some confidence-boosting tips.
Read more:
- Yosemite 2-Day Itinerary: The Best Sights For Weekend Warriors
- The Ultimate 10-Day Road Trip You Need: Best Of Highway 1, Yosemite, Lake Tahoe
How to get to Sentinel Dome
If you’re starting from Yosemite Valley, you will need to make a 1 hour drive up to Glacier Point Road. This will bring you from the valley floor all the way up to the top of the granite cliffs. Along the way, you will also pass by Tunnel View.
In most years, there is a fee-based Glacier Point tour bus that can take you from Yosemite Valley to Glacier Point (check availability). However, the timings are fixed and the bus takes visitors back to the valley in the early afternoon. If you want to hike to Sentinel Dome for sunset, it’s best to carpool or take your own car.
You can also check out Washburn Point, Glacier Point, and Taft Point which are all within a few miles along this road. If you have time, I recommend driving to Washburn Point and Glacier Point first for easy photo spots.
After that, head back where you came from towards the Taft Point and Sentinel Dome trailhead (shared trailhead and parking lot).

When can you hike to Sentinel Dome
Since Sentinel Dome is accessed via the Glacier Point Road, you can only hike there when the road is open in the warmer season. Generally, that will be from May to November after most of the snow has melted.
If you’re visiting Yosemite in winter instead, there are also other fun things you can do – for example hiking Upper Falls for a bird’s eye view of the valley.
If you’re going in early summer or late spring, you may even be able to see some snow. You can refer to the Yosemite webcam of the high sierras to check the conditions. We also used this webcam to anticipate the type of lighting and colors we will get during sunset.


How early should you get to Sentinel Dome
It’s best to arrive at the spot at least 30 minutes before sunset. That way, you will have enough time to enjoy with your eyes and also to set up your shot for the perfect photo.
In addition, the sky changes the scenery dramatically when it’s close to sunset, so you don’t want to miss any of those golden moments.
Aside from setting aside time for the 1 hour hike (one-way), you should also plan for some waiting time in case the parking lot is still full when you arrive. It should be safe if you have a 30 minute buffer time for this, and it also gives you plenty of time to visit the restroom at the trailhead before starting the hike.
In total, aim to get to the parking lot at least 2 hours before sunset. If you think you may take a longer time to hike to the top of Sentinel Dome, adjust that timing accordingly.

Planning the route to Sentinel Dome
The hike to Sentinel Dome can be done in 2 ways, with varying distance and duration. The trail is short enough that it can even be part of a day trip to Yosemite.
1. Sentinel Dome Trail (out and back)
If you’re short on time and want to focus on the best experience and fewer crowds, go straight to Sentinel Dome.
- Distance: 2.2 miles, 3.5 km (round trip)
- Duration: 1.5 to 2 hours (round trip)

2. Taft Point, Roosevelt Point, Sentinel Dome Loop
This is a great choice if you have a little bit more time for hiking. After visiting Taft Point, which is another popular spot, you can escape the crowds by heading out towards Roosevelt Point before arriving at Sentinel Dome.
- Distance: 5 miles, 8 km
- Duration: 2.5 to 3 hours

Starting the hike to Sentinel Dome for sunset
The start of the hike was very pleasant and easy, mostly a dirt trail through the trees. A little while later, you will start walking on slabs of rock that stick out from the trail slope. Although it’s not a difficult trail, this part requires some balancing and shoes with a good grip to help you feel more confident.

It’s alright if you start to feel out of breath, after all you are hiking at 3,200 ft (975 m) higher than the valley so you may not be used to the elevation. Take it easy and enjoy the views along the way. Soon, you will start to see Sentinel Dome come into view.

Climbing up Sentinel Dome
Here comes the toughest part – climbing up Sentinel Dome. Well, actually it’s just a steeper slope up the side of Sentinel Dome. Thankfully the granite rock was quite rough so it didn’t feel scary going up.
This part can be quite tiring, so take your time with it and just enjoy the process. Since we had time, we took a few pictures on the slope of Sentinel Dome since we had never hiked on this type of terrain before.
We reached this part of the trail about 40 minutes before sunset, and there was a golden glow of evening light illuminating this incredible landscape. It felt cool that we could walk up something that looked huge from the bottom.


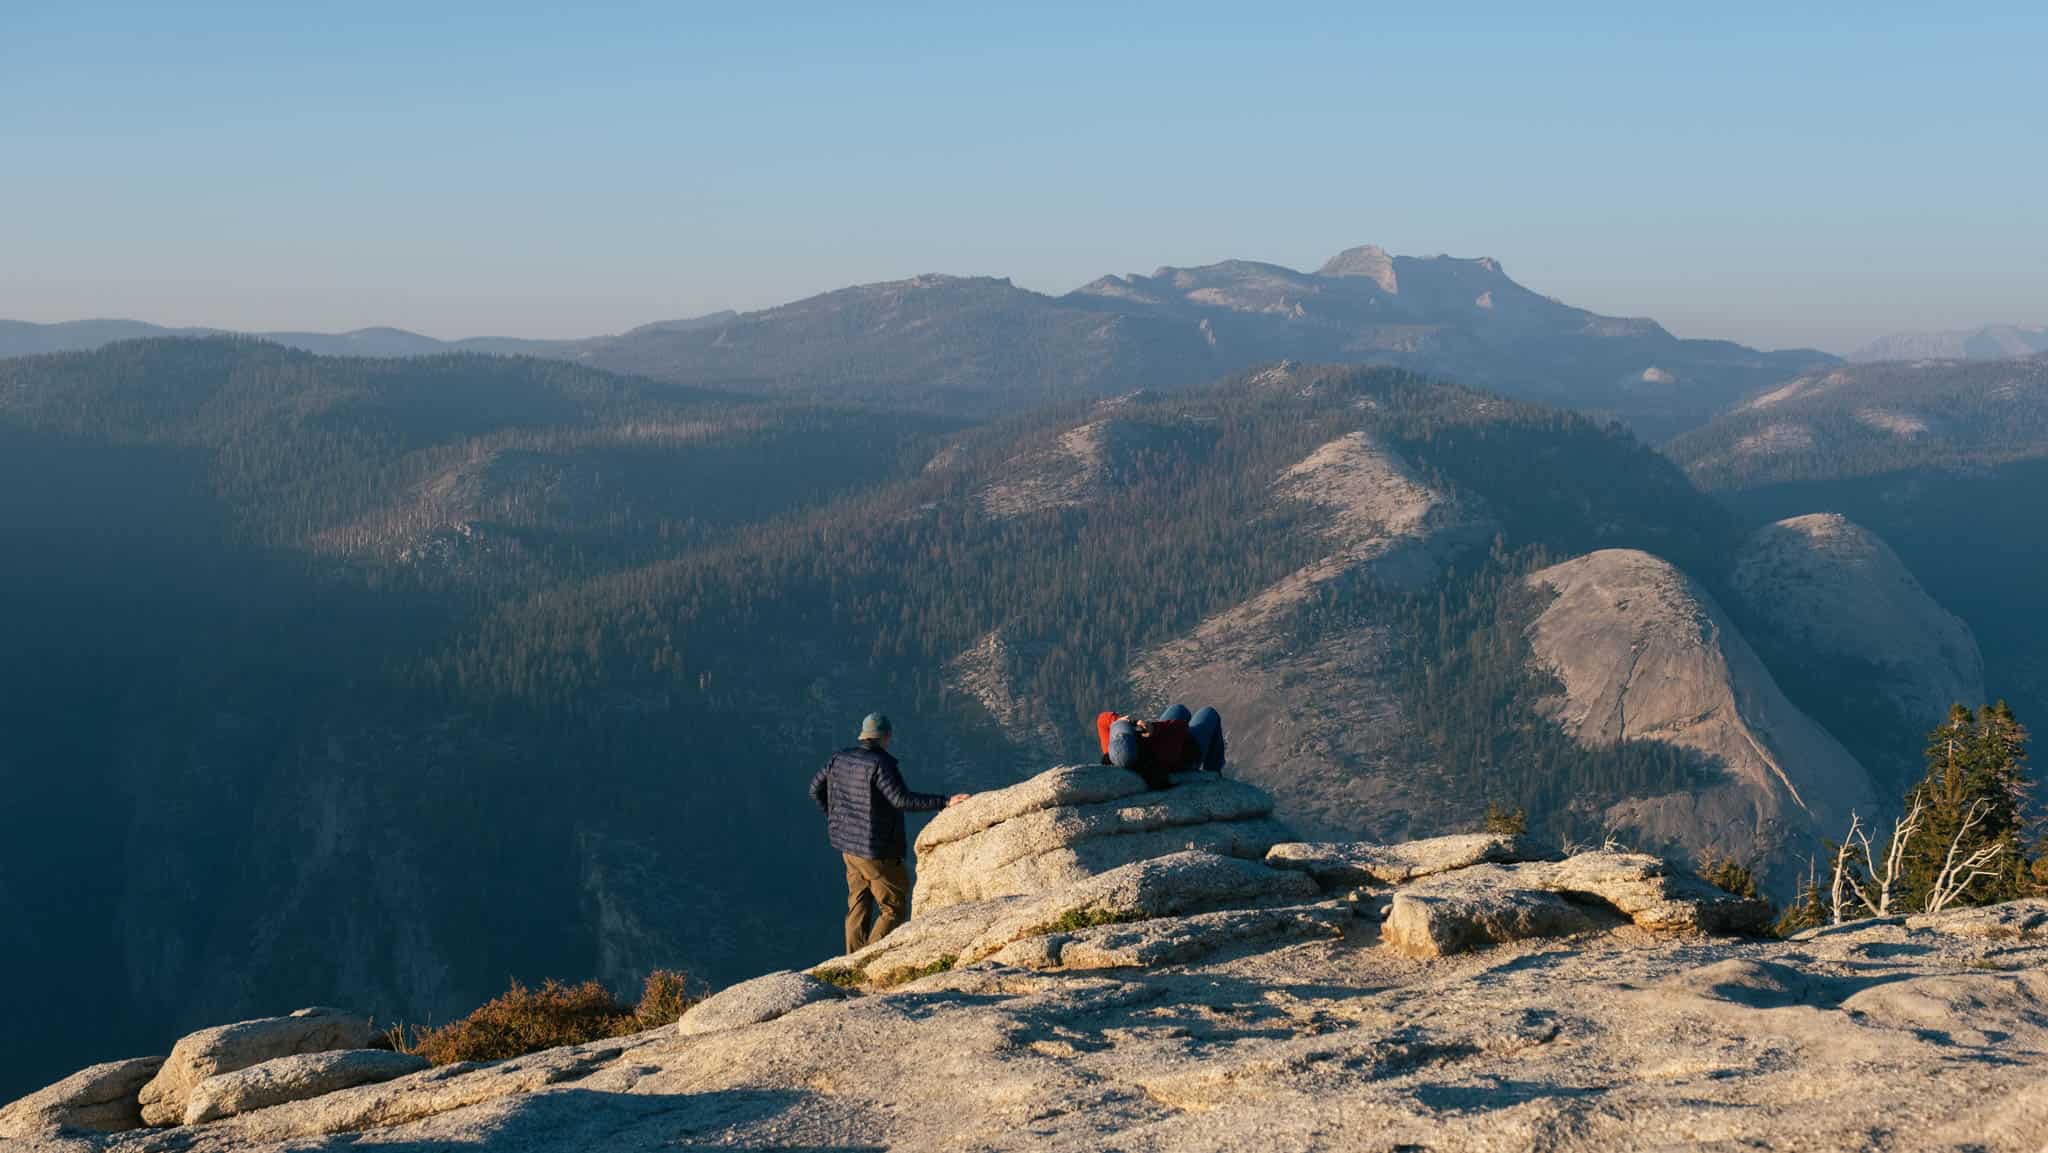
Sunset photography at the top of Sentinel Dome
Finally, when we reached the top of Sentinel Dome, we were stunned by how much of the surrounding scenery we could see.
Looking out to the West, you can see the Merced River in Yosemite Valley, although the evening sunlight may be blinding at this time.
As you turn 180 degrees towards the East you’ll see Yosemite Falls, El Capitan, Half Dome, Cloud’s Rest, Nevada Falls and Vernal Falls. Isn’t that just the best view? Unblocked scenery for miles!

Our favorite photography spot was the view directly facing Half Dome towards the East. The way the evening light turned from orange to pink and purple was really amazing. We took some time lapses and some self portraits with a tripod.
Finally, as the light was dimming into the blue hour, we sat down, ate an energy bar and just enjoyed the view.

Hiking back after sunset
We saw people, including families with kids, start leaving Sentinel Dome when the sunset was almost over, so we decided to follow along. After all, there’s safety in numbers right? It was nice to walk with other people because we didn’t want to get lost in the dark.

We went down the steep slope without a problem and could still see the metal trail markers and knew we were heading in the right direction.
The only tricky part was that rocky part of the slope we encountered near the halfway point the trail. It’s okay to go slowly here as everyone took a moment to pass through as well.

There’s something special about hiking in blue hour as the moon starts to shine. We would totally do this again when there’s a full moon.
Finally, we returned to our car and made the drive back to Yosemite Valley to camp for the night.
Read more: How To Choose The Best Places To Stay At Yosemite

What to bring for a sunset hike to Sentinel Dome
I love that it’s not too difficult and we can come back and do it whenever Glacier Point Road is open in the warmer seasons. Let’s see what we need to bring for this hike to Sentinel Dome. You can also refer to this Yosemite packing list for a comprehensive guide.


Photography gear
Sunset at Sentinel Dome is the perfect chance to practice photography. The hike is short so it doesn’t hurt to bring your photography gear along. You can also take photos of yourself hiking, which will serve as a great Yosemite memory.
- Camera or phone tripod that is sturdy enough in case there’s a gust of wind
- Camera (with batteries/charged) – I use the Fuji XT4 which is an APS-C sensor mirrorless
- Wide aperture lens – I use Fujinon XF 16-55mm F2.8 which has been so reliable yet versatile
Navigation
There aren’t any maps available on the trailhead, so it is important that you have an offline map/physical trail map before you start hiking. Do also bring a portable charger if you are relying on your phone for navigation.
We prepared a few offline maps just in case:
- AllTrails hiking information
- Offline Google Maps
- Offline Maps.me
Hiking gear
Although its just a moderate hike, you may want to bring some of these hiking equipment along.
- Hiking day pack
- Shoes with good grip
- Hiking poles (if your knees need some support tackling the downhill parts)
- Water
- Snacks
- Warm layers – check the weather forecast beforehand too
- Headlights (with batteries/charged)


