

One Day in Yosemite: Perfect Itinerary for First Timers
Is this your first time visiting Yosemite and you only have one day in Yosemite to explore? With such limited time, it’s hard to know what’s actually worth prioritizing, especially when waterfalls, valley views, and iconic hikes are spread across a massive park.
This guide is designed for a realistic day trip to Yosemite, showing you exactly how to plan an efficient route, what not to skip, and how to avoid wasting time driving in circles.
We’re obsessed with Yosemite and have visited seven times since moving to California, testing different one-day combinations across seasons. Based on that experience, this is my perfect one-day Yosemite itinerary for first-time visitors, optimized for May through November.
Most major viewpoints are easy to reach by car or shuttle, and I’ve included two short but unforgettable hikes, including my favorite sunset photography spot along Glacier Point Road.
This article uses affiliate links where I make a small commission if you make a purchase through my links, at no additional cost to you. As an Amazon Associate I earn from qualifying purchases.
Important tips for visiting Yosemite
These are the things that save the most time and money for first-time visitors
🚙 Rent a car early: DiscoverCars
🛌 Stay near the entrance: Here’s where I recommend
🥾 Consider a guided tour if you don’t want to drive
🗺️ Download offline trail maps (cell service is unreliable)
Overview of this one day Yosemite itinerary
If you only have one day in Yosemite, this itinerary focuses on Yosemite Valley highlights in the morning, followed by iconic viewpoints and a sunset hike along Glacier Point Road.
| Time | Stop | Notes |
|---|---|---|
| 9:00AM | Mist Trail (Hike to Vernal Falls Footbridge) | 2–2.5 hrs, short uphill |
| 11:30AM | Yosemite Valley (Lunch at Base Camp Eatery or Degnan’s Kitchen) | Quick options, coffee nearby |
| 12:30PM | Lower Yosemite Falls (Easy walk) | 30–60 min |
| 1:30PM | Cook’s Meadow Loop (Scenic walk) | 20–45 min, flat, views of Half Dome |
| 2:30PM | Yosemite Chapel (Optional detour) | 15–30 min |
| 3:00PM | Bridalveil Fall (Short walk or photo from Tunnel View) | 30–45 min |
| 3:45PM | Tunnel View (Iconic overlook) | 15 min |
| 5:00PM | Washburn Point (Quick stop) | Less crowded than Glacier Point |
| 6:30PM | Sentinel Dome (Sunset hike) | 2–2.5 hrs, 360° views |
Total time: ~10–11 hours
Best for: First-time visitors, May–November
Getting around: Combination of park shuttle + short drives
💡 Tip: You don’t need to do every stop. Pick the viewpoints or hikes that matter most to you and enjoy the experience instead of rushing.
California Camping Workbook
Use my Editable-Canva Templates to help you plan your camping trip in 60 minutes
Where to stay near Yosemite National Park
Best lodges for a one-day Yosemite trip
These are my top hotel picks near Yosemite, depending on which entrance you’re using and your budget:
| Lodge Name | Best for | Nearest entrance | Approx price |
|---|---|---|---|
| Tenaya Lodge | Luxury, spa, stress-free stay | South Entrance (Hwy 41) | $$$ |
| Rush Creek Lodge | Families, modern cabins | Big Oak Flat (Hwy 120) | $$$ |
| Yosemite View Lodge | Closest to Yosemite valley | Arch Rock Entrance (Hwy 140) | $$ |
💡Pro tip: Book your stay as early as possible, because availability gets snapped up quickly for summer weekends and holidays.
If you only have one day in Yosemite, where you stay matters more than most people realize. Staying close to a park entrance can easily save you 1–2 hours of driving, which is a huge advantage in summer if you want to beat the crowds, find parking, or stay late for sunset. If you’re looking for more options by budget and entrance, I’ve put together a full guide on where to stay near Yosemite.
Tenaya Lodge
Best near the South Entrance (Highway 41)
This is a full-service lodge with spacious rooms, a spa, and on-site dining, making it a comfortable choice if you want a stress-free stay before an early start into Yosemite Valley
👉 Check availability and prices for Tenaya Lodge
Rush Creek Lodge
Best overall experience near Big Oak Flat Road (Highway 120)
This is one of the best overall places to stay near Yosemite, especially if you’re entering from Big Oak Flat Road (Highway 120). It has modern rooms, cozy cabins, and included activities that make it great for couples and families.
👉 Check latest rates for Rush Creek Lodge
Yosemite View Lodge
Best value option closest to the park
Located in El Portal just outside the Arch Rock Entrance, this is one of the closest hotels to Yosemite Valley. Many rooms have kitchenettes and river views, making it ideal if you want convenience without the higher price tag.
👉 See current prices for Yosemite View Lodge
Practical tips for visiting Yosemite
When is the best time to visit Yosemite
Yosemite is gorgeous year-round, but for this guide, I’m focusing on May–November when most high-elevation roads like Glacier Point Road and Tioga Pass are open.
- Early Summer / Late Spring (May–June) – This is my favorite season as most trails are open, the weather is perfect for a full day of hiking and the waterfalls are at their peak.
- Summer (July–August) – The high country is stunning, but it can get hot in the valley and the crowds are at their peak. Waterfalls might also slow down a bit.
- Early Fall (September–October) – Gorgeous fall colors, though some waterfalls may be dry.
- Winter (December–March) – Yosemite is incredible under snow, but it’s tricky for a first-time visitor with variable road conditions. I have a separate winter guide if you’re interested.
If you’re only planning one day in Yosemite, I really recommend early summer. It’s the sweet spot for access, daylight hours, and seeing the park at its best.
Where to park
Yosemite can get really crowded in the summer. Finding parking can feel impossible if you show up too late. From experience, arriving before 9 AM usually works well.
For this itinerary, I suggest parking at:
- Yosemite Village – Super convenient because a lot of our stops are nearby. You won’t have to trek back and forth to your car.
- Yosemite Valley Lodge – Also a great spot. There are a few food options, and it’s easy to walk to Yosemite Village from here.
I usually avoid the Mist Trail parking lot because it’s farther from most of the stops and adds unnecessary walking.
How to get around Yosemite Valley
Once you find a parking spot, I suggest leaving your car until you’re ready to leave the valley. Most of Yosemite Valley is best explored on foot, by cycling, or via the free park shuttle, which runs on a loop.
- The Valleywide Shuttle (Green Route) hits all the main stops. You can get from El Capitan Meadow to Yosemite Valley Lodge, Yosemite Village, Mirror Lake, and Curry Village without driving.
- The East Valley Shuttle (Purple Route) covers a smaller area around Curry Village, campgrounds, and the Mist Trail.
The shuttles run from 7 AM to 10 PM at intervals of 12 to 22 minutes, though summer traffic within the valley may cause delays. Make sure to buffer extra time and check each stop for route information before boarding.
Entry fees and reservations
Here’s the breakdown for entry fees:
- Day pass: $35 per vehicle
- Pricing differs for residents and non-residents:
- U.S. residents need a state-issued ID (like a driver’s license)
- Foreign tourists pay $100 per person per day
- Annual pass: $80 for residents, $250 for foreigners. This is worth it if you’re planning to visit 3 or more national parks.
In addition, reservations have changed over the years. In the past, summer weekends sometimes required them to manage crowds. They cost $2 per ticket, are non-refundable, and don’t include your vehicle day pass.
For 2026, reservations haven’t been released yet. Keep an eye on the official Yosemite site so you can grab one if needed.

Yosemite one-day itinerary
1. Hike Mist Trail to Vernal Falls Footbridge
As you drive into the valley, the stunning El Capitan shows up to welcome you. If you look closely, you might even see some climbers on the rock. Feel free to stop by the roadside at El Capitan Meadow to admire it.
Let’s start our day with one of the most popular hikes in Yosemite, Mist Trail. It features the Merced River and two waterfalls – Vernal Falls and Nevada Falls. Since we’re only here for a one-day trip, we’ll just hike to the Vernal Falls Footbridge to get a taste of the incredible scenery.
It takes roughly 1.5 hours to hike the 1.6 miles (2.6 km) round trip with 400 ft (120m) of elevation gain. The trail is mostly uphill on the way to the footbridge, and the steps can feel tough on the knees coming back down.
Hence I highly recommend bringing hiking poles, especially if you’re not used to elevation or steep stairs. They can make a noticeable difference on the Mist Trail.
- Nearest shuttle stop: #16
- Starting point: Mist Trailhead
- Restrooms: Available at Curry Village, Mist Trail head, and Vernal Falls Footbridge
- Time to spend here: 2 to 2.5 hours

2. Lunch at Base Camp Eatery (plus other suggestions)
Location: 3 miles from Mist Trail head, take shuttle from stop #16 to #7
Head to Base Camp Eatery at Yosemite Valley Lodge, which has crispy chicken, sandwiches and burgers. There’s also a Starbucks beside it, which is really convenient for your afternoon coffee fix.
Another place we’ve tried is Degnan’s Kitchen in Yosemite Village and get their hearty sandwiches in a cosy wooden-aesthetic restaurant. There’s a fireplace there that’s perfect for colder days, or you can dine outside too. Why not pop by the Village Store while you’re here and browse for some souvenirs too.
Here’s a list of the dining options in Yosemite so you can pick whichever is most convenient:
Yosemite Village – shuttle stops #1/2/4/5
- Degnan’s Kitchen
- Village Grill
Curry Village – shuttle stops #14/19
- Seven Tents Pavilion
- Bar 1899
- Pizza Deck
- Meadow Grill
Yosemite Valley Lodge – shuttle stop #7
- Base Camp Eatery
- Mountain Room Restaurant
The Ahwahnee hotel – shuttle stop #3
- Bar
- Dining room
If you’re visiting during peak summer, dining options inside the park can get busy around noon. I usually aim for an early lunch or grab something quick so I can spend more time exploring Yosemite Valley instead of waiting in line.

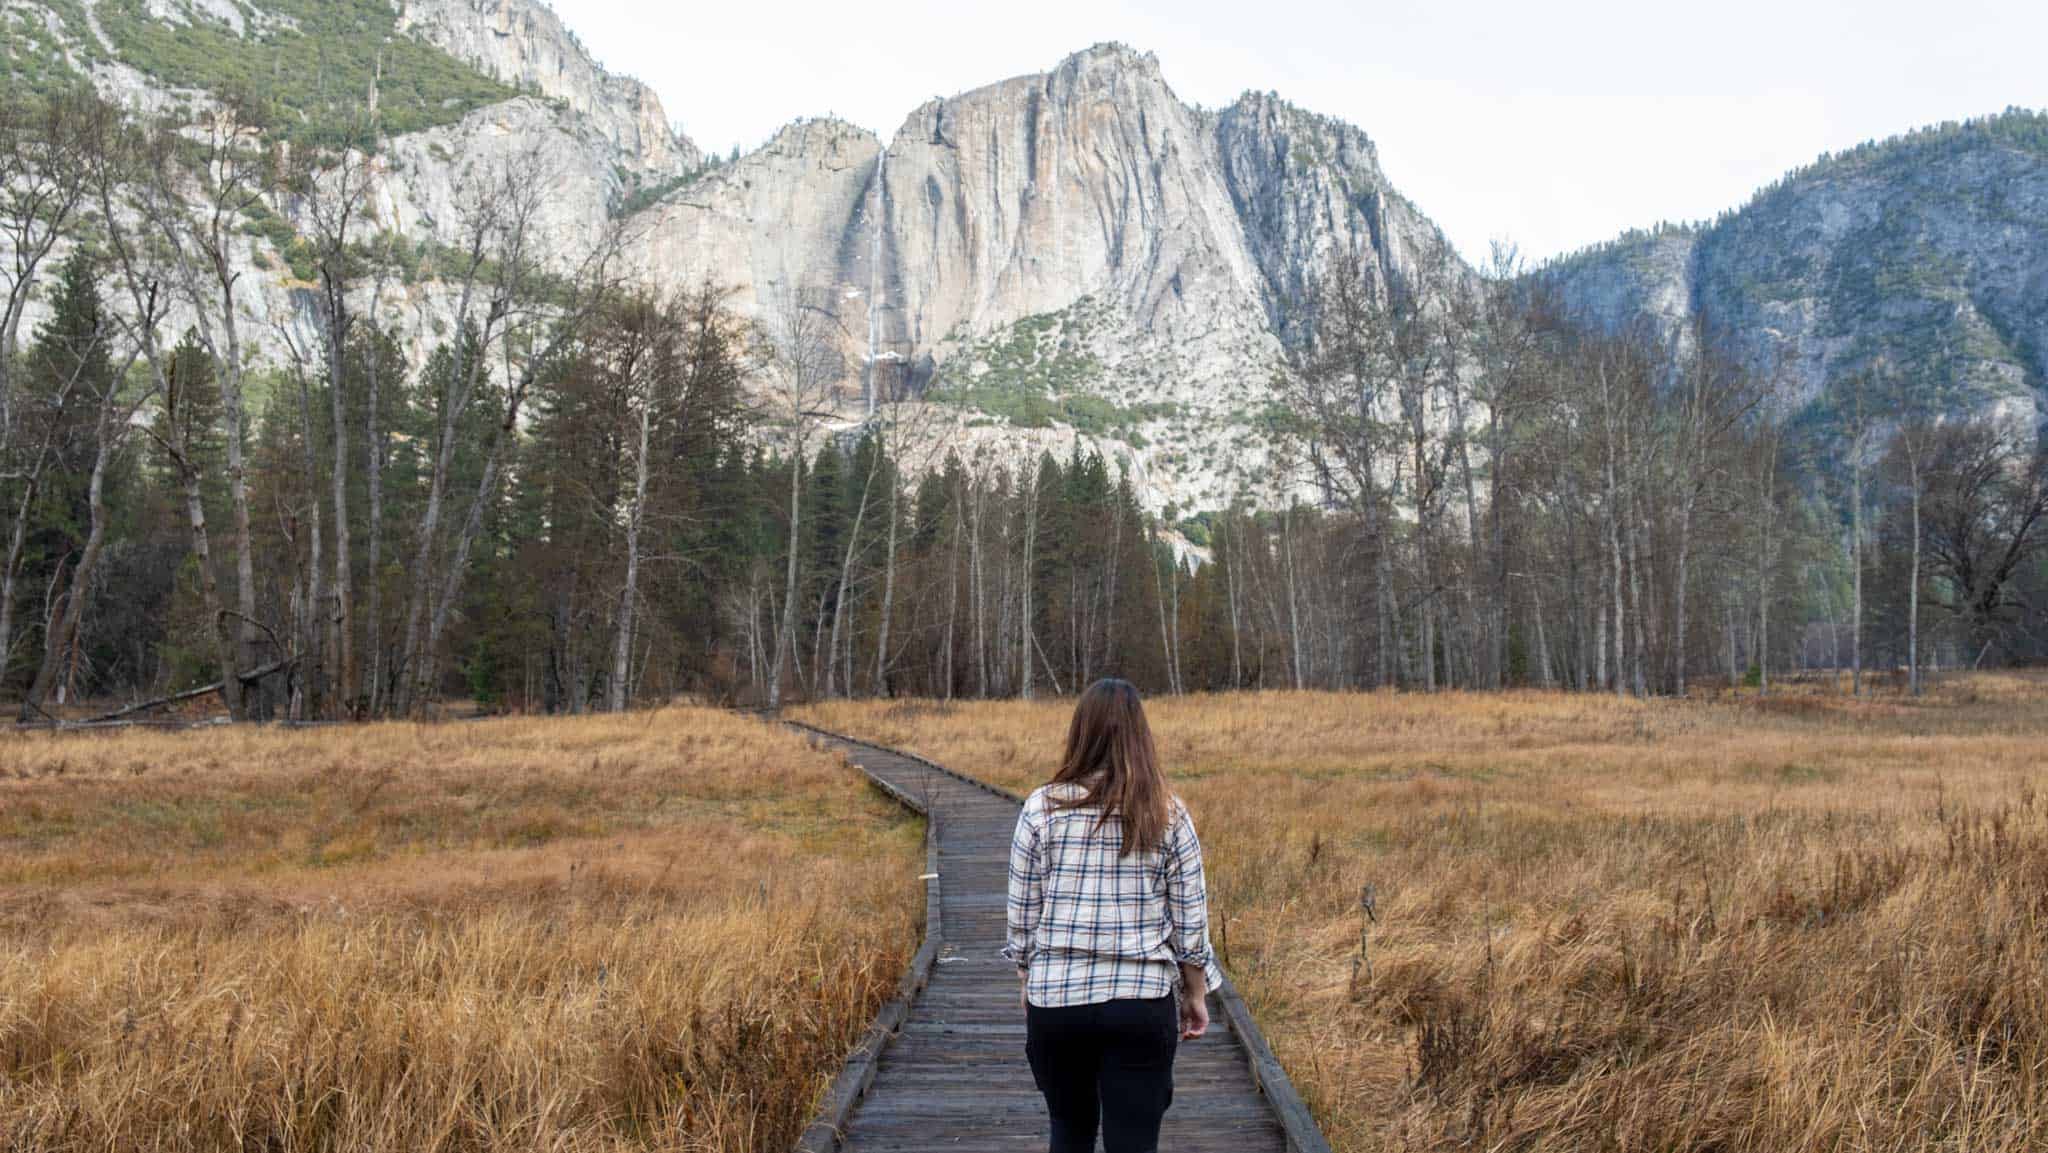
3. Check out Lower Yosemite Falls
Location: 0.3 mile (7 min walk) from Base Camp Eatery
After lunch, we’ll take a walk to Lower Yosemite Falls, which is one of the 3 parts of the famous Yosemite Falls.
As you walk along the Lower Yosemite Falls Trail, you’ll see both Upper and Lower Falls in the distance. This takes you to the base of the waterfall, where you’ll see water gushing down during summer. You could also scramble over the rocks to get to the base of Lower Falls.
If you’re visiting in early fall, note that the waterfalls might not be as impressive. That’s also why summer is the most crowded time of year, because everyone wants to see the waterfall in its full force and when the weather is warm.
The path is quite easy and relaxing, only 1 mile (1.6 km) along a flat trail. Going through this trail takes around 30 minutes, but you could always spend more time here if you prefer a more leisurely pace.
- Nearest shuttle stop: #6
- Starting point: Lower Yosemite Fall Trailhead
- Restrooms: Yosemite Falls Bathroom
- Time to spend here: 30 min to 1 hour

4. Take a walk in Cook’s Meadow Loop
Location: 0.5 mile (9 min walk) from Lower Yosemite Fall Vista Point
After completing the Lower Yosemite Falls loop, head towards Sentinel/Cook’s Meadow Loop on Google Maps. This takes you on an anti-clockwise loop that ends at Cook’s Meadow Loop Trailhead. It is also a short and easy trail, covering 1 mile (1.6 km) along a flat route.
This is one of the easiest walks, yet with the most stunning and varied views. As you loop around the meadow, you’ll experience the vastness of the surrounding landscape. Try to identify Yosemite Falls, Half Dome, Glacier Point, Sentinel Rock, and more.
There’s a boardwalk leading from Yosemite Falls Vantage Point back to Cook’s Meadow Loop Trailhead, which has Yosemite Falls in the background. Don’t forget to snap a shot here!
- Nearest shuttle stop: #6
- Starting point: Sentinel/Cook’s Meadow Loop
- Restrooms: Yosemite Falls Bathroom
- Time to spend here: 20 to 45 minutes

5. See Yosemite Chapel via Superintendent’s and Sentinel Bridges
Location: Extra 0.6 mile detour (12 min walk) across the Merced River from Cook’s Meadow
If you have more time, you can also extend the Cook’s Meadow Loop trail by crossing over the Superintendent Bridge, which leads to Yosemite Chapel, then crossing back via Sentinel Bridge.
- Nearest shuttle stop: #1/6
- Starting point: Superintendent’s Bridge
- Restrooms: Yosemite Falls Bathroom
- Time to spend here: 15 to 30 minutes
6. Feel the mist under Bridalveil Fall
Location: 6.1 miles (14 min drive) from Yosemite Village
We’ve pretty much seen the best things we can fit into a day at Yosemite Valley, so let’s make our way up to Glacier Point. Before that, you can also stop at Bridalveil Fall as it is on the way out of the valley. It usually has decent flow even when other waterfalls like Yosemite Falls dries up.
To get to the base of Bridalveil Fall, you’ll take a short paved walk from the parking area. The total round trip distance is only 0.5 mile (0.8 km), and is mostly flat. Eventually, you’ll feel the refreshing mist from the waterfall on your skin as you admire it from below.
There tends to be traffic congestion in this parking lot because it’s not big, so I would just skip this trail and view the Bridalveil Fall from Tunnel View instead.
- Parking: Bridalveil Fall Parking Area
- Restrooms: Available at parking area
- Time to spend here: 30 to 45 minutes

7. Admire the scenery at Tunnel View
Location: 1.6 miles (4 min drive) from Bridalveil Fall
Tunnel View is one of the most iconic and must-see viewpoints in Yosemite. If you’re entering by the South Entrance, Tunnel View is the first sight you’ll see once you exit the tunnel. However, if you came in through Arch Rock or Big Oak Flat Road Entrance, this would be your first time seeing the iconic Tunnel View.
The parking lot is small, but people tend to stop for only a short while here. I recommend waiting around to get a parking spot because the view is worth it! In summer, Tunnel View showcases El Capitan and Bridalveil Waterfall in the foreground, as well as Half Dome peeking out from the background.
In case the view looks familiar, that’s because this view of Yosemite Valley was used for a Mac OS default wallpaper. If you decide to end the day here, it’s also a great spot for sunset.
- Parking: Tunnel View parking
- Restrooms: None
- Time to spend here: 15 minutes

8. Drive up Glacier Point Road to Washburn Point
Location: 22.7 miles (1 hr drive) from Tunnel View
Buckle up, because we’re going to drive up Glacier Point Road to the cliffs that overlook Yosemite Valley.
People often fail to realize that Glacier Point is actually not “near” Yosemite Valley, even if it looks like they’re just next to each other on Google Maps. Technically they are really side by side – just with a 3,200 ft difference in elevation. Hence, Glacier Point Road is only open during the warmer months after the snow clears.
You can visit both Glacier Point and Washburn Point depending on how much time you have. I felt that Washburn Point felt less crowded and I enjoyed having space to take photos freely. It’s almost like a quieter version of Glacier Point. In addition, there’s a short walk required to get to Glacier Point, whereas Washburn Point was just a lookout.
- Parking: Washburn Point parking
- Restrooms: None (nearest at Glacier Point parking)
- Time to spend here: 10 minutes

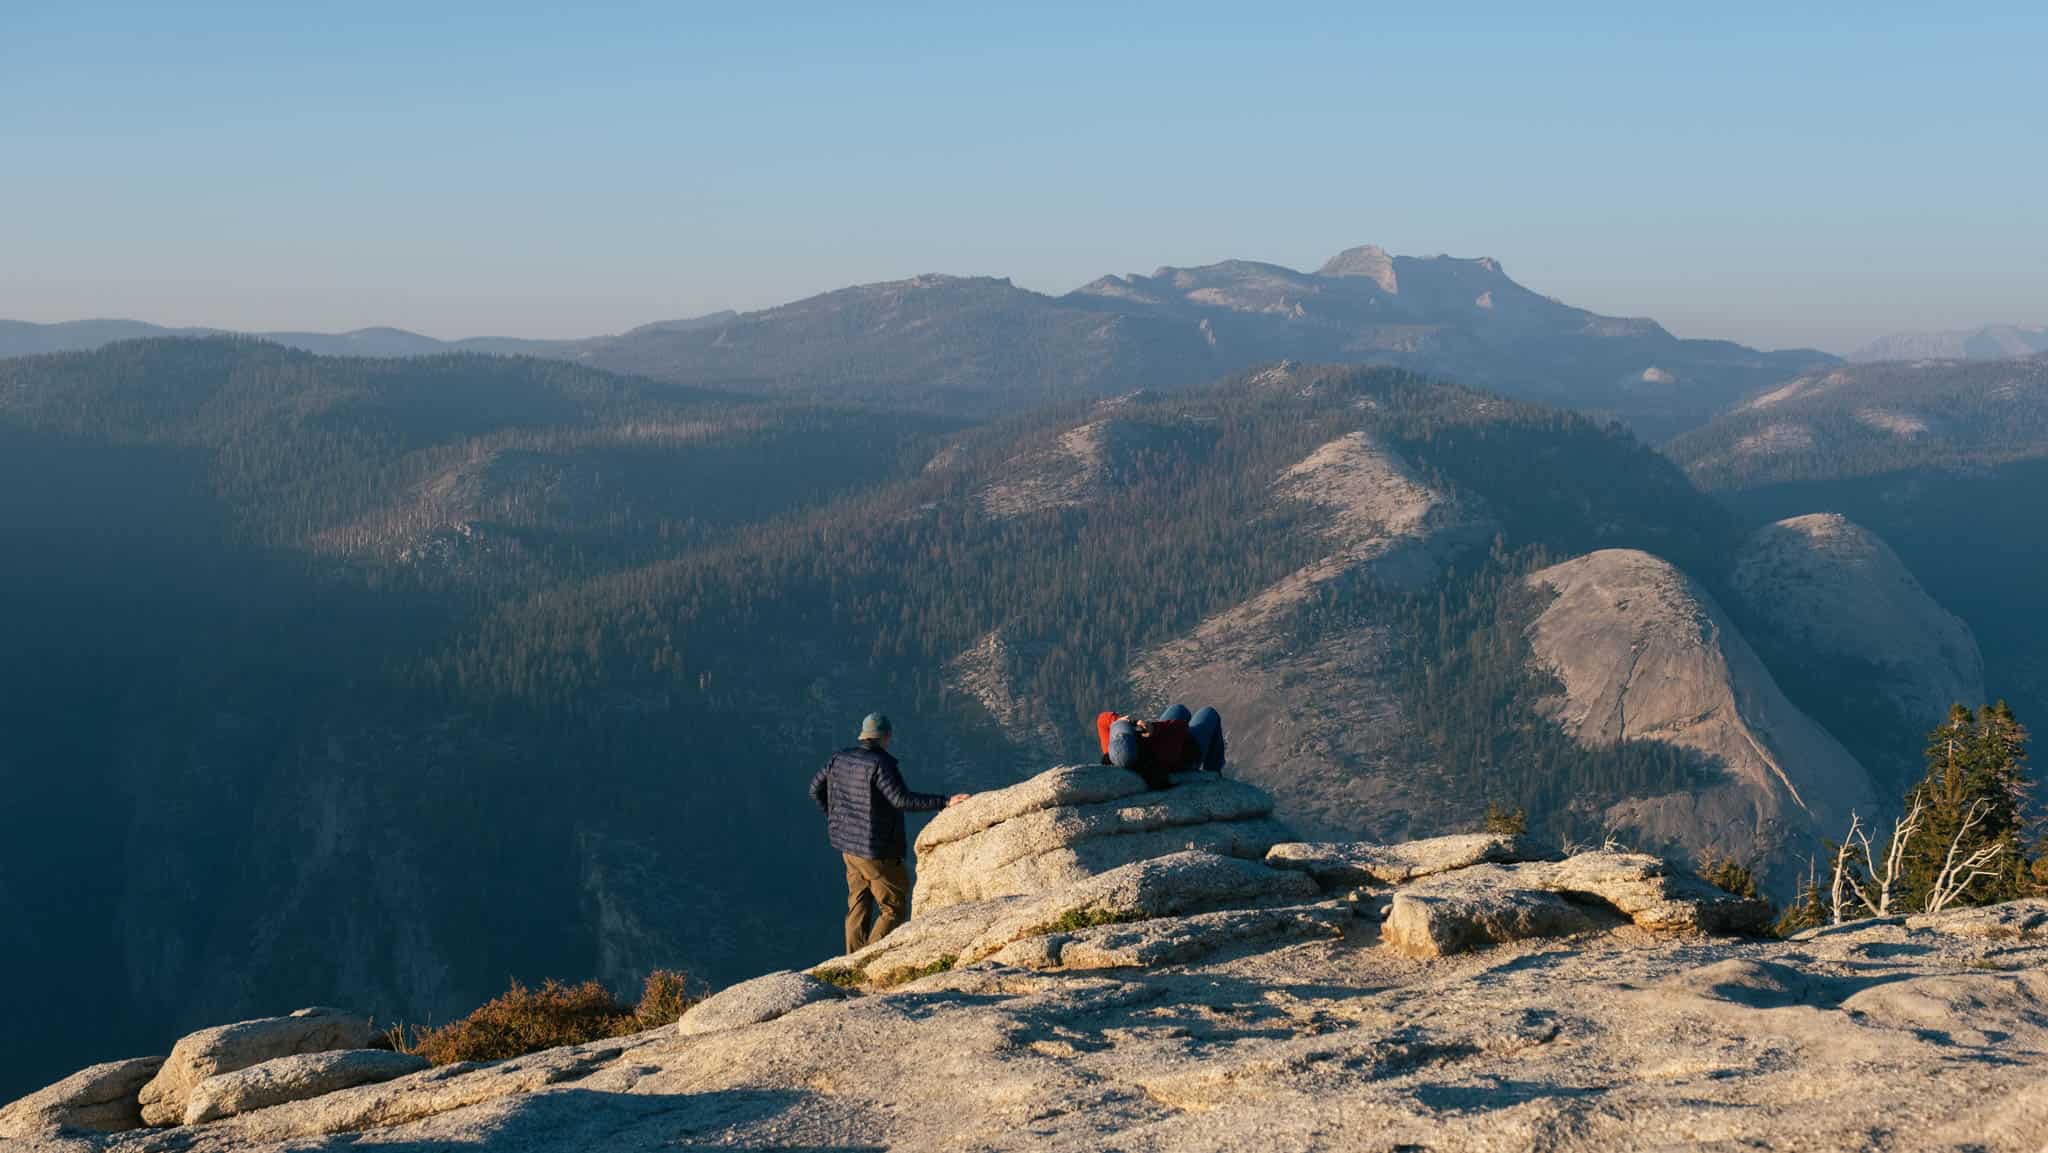
9. Hike to Sentinel Dome for sunset
Location: 1.6 miles (10 min drive) from Washburn Point
Now for the cherry on top of your Yosemite trip. I love this recommendation because not many people have done it, and if you’re willing to make a short hike out it will be really rewarding.
The hike to Sentinel Dome takes 1.5 to 2 hours as a round trip, covering 0.9 miles (1.5 km) each way and gaining 400 ft (125 m) in elevation. However, we will take a longer time than that since we want to watch the sunset at the top.
Similar to all other parts of Yosemite in summer, parking can be hard to come by so I recommend arriving at the parking lot 2 hours before sunset. That way, you’ll have ample time to make the hike to Sentinel Dome after waiting for parking.
At the top of Sentinel Dome, you’ll get a 360-degree panoramic view of the High Sierras. You can actually walk across the top of Sentinel Dome to check out different viewing angles. For example, you’ll see the orange hues of the sunset hit the side of Half Dome, providing perfect lighting for photography.
You can find more information about how to navigate and plan for a Sentinel Dome sunset photography hike in my other article. Isn’t it the perfect way to end your Yosemite trip?
- Parking and restrooms: Sentinel Dome/Taft Point Trailhead
- Time to spend here: 2.5 hours

What gear to bring to Yosemite
Whether you’re going to Yosemite for a casual stroll, to hike or even camp, this packing list will give you some ideas of things you should bring.
👉 See my recommended hiking gear here
To make the most of your adventure, it’s essential to come prepared. Here’s a checklist to ensure you have everything you need.
Hiking essentials and comfort items
- Hiking boots or shoes: Comfortable and supportive footwear is a must so you’ll have the best experience. Waterproof boots can be useful for muddy trails.
- Hiking day pack: It should have enough space to store snacks, water, and any extra clothing. Here are some affordable hiking backpacks below $100 to consider.
- Water: Stay hydrated, especially during warmer months. Water reservoirs with up to 3-litre capacity are useful for longer hikes. In general, bring at least 0.5 litres for every hour of hiking.
- Map and navigation: Having offline trail maps adds an extra layer of security. Offline Google Maps also helps.
- Snacks: Pack energy-boosting snacks to keep you fueled throughout the hike. These could be energy bars, nuts, or some sweets.
- Sun hoody: This UPF 50+ sun hoody is very breathable, comfortable, and blocks her 98% of UV from reaching your skin.
- Sunscreen and cap: Protect yourself from the sun, especially during the open sections of the trail.
- Layered clothing: For example, bring a fleece sweater and wear a sweat-wicking base layer. Rain jackets can also act as a windbreaker.
- Camera
- Phone tripod: If you’re hiking alone, having a phone tripod is great for filming shots of yourself.
- Trekking poles: Provide extra stability on uneven terrain and downhill sections.
Things to know before you go to Yosemite
Now, I probably gave you a lot of ideas of ways to maximize your day trip to Yosemite. Remember that you can always remove some activities if you need more time to relax. Besides, you could always come back to Yosemite again in future.
How many hours should you plan to spend in Yosemite?
Since summer is known to be the busiest time of the year, I suggest getting to Yosemite by 8:30am. If that means leaving San Francisco at 4:30am, I think it’s worth it.
Thankfully, you get long daylight hours up to around 8:30pm too, and I’d encourage you to make full use of it if you’re only going to be there for a day.
I still recommend spending 2 days in Yosemite if you have the time because this park is stunning!
Can you see Yosemite by car?
Technically, yes you can see Yosemite by car. However, going in summer means that parking in Yosemite Valley is limited due to the crowd. It’s a hassle trying to find parking throughout the day, so cycling or taking the free park shuttle is best. You’ll only be driving again when you’re ready to drive up to Glacier Point Road.
In addition, there are no gas stations in the valley, so do make sure to get gas outside the park. The ones close to Yosemite tend to be more expensive, such as in El Portal, Wawona, and Crane Flat.
Short on time? These Yosemite tours are worth considering
If you don’t have a car, don’t want to deal with parking, or are visiting Yosemite during peak summer, booking a guided tour can actually save you time and stress. Here are the best Yosemite experiences on GetYourGuide, depending on where you’re coming from and how much time you have.
Best Yosemite day trips from San Francisco
Yosemite Day Trip with Giant Sequoias Hike
This is a full-day guided trip with transportation. It’s ideal if you want to see Yosemite Valley and walk among giant sequoias in Tuolumne Grove without driving yourself. There’s also 2 hours of free time to explore in the Yosemite Valley for lunch, hiking, or swimming in the river.
This classic Yosemite Valley tour with hotel pickup is perfect for first time visitors. It’s straightforward and you’ll be taken to photo opportunities like Tunnel View and Bridalveil Fall. After the tour, you’ll also get 3 hours of free time to explore on your own. There’s so much you can do with this option.
👉 View tour details and pricing
How to plan a route in Yosemite Valley
Yosemite Valley is a small but incredibly scenic part of the National Park, and is where most people go when they’re visiting for the first time. There, you can look up around you and be face to face with huge granite cliffs.
One thing you should know is that the road within Yosemite Valley follows a one-way anti-clockwise direction. Since we’re trying to optimize our day in Yosemite, we’ll quickly park at one of these spots and start our exploration the valley via the park shuttle.
- Curry Village
- Yosemite Village
- Yosemite Valley Lodge
- Other roadside parking (if available)
We’ve also allocated time to drive up to Glacier Point Road from the valley. If you’re visiting during shoulder season, make sure to check on the latest road conditions here.
Which entrance to Yosemite is best?
During May to November, the best entrance depends on where you’re driving from. Here’s what I recommend when you’re driving into Yosemite Valley from various parts of California.
Los Angeles (Southern California)
- South Entrance via Highway 41
- Stay at: Tenaya Lodge ($$$) or Best Western Plus Yosemite Gateway Inn ($$)
San Francisco (Northern California)
- Big Oak Flat Entrance via Highway 120 – read here for more ways to get to Yosemite from SF
- Stay at: Rush Creek Lodge ($$$) or Evergreen Lodge ($$)
Central Coast (e.g. Big Sur and Monterey)
- Arch Rock Entrance via Highway 140
- Stay at: Yosemite View Lodge ($$) or Yosemite Bug Rustic Mountain Resort ($)
If you’re looking for a place to stay in or around Yosemite, you’ll want to check out this article.

Summer crowd and parking tips
Yosemite’s summer traffic can get really intense – which is probably why the permit reservation system got implemented starting in 2024.
Nonetheless, I recommend arriving in Yosemite earlier to secure parking. After that, leave your car at the same spot for the whole day and get around by walking or taking the free park shuttle.
Sometimes the shuttles are so full that you need to wait for the next one, so that’s another thing you need to be flexible about.
Bear safety
There are black bears in Yosemite National Park, so don’t be surprised if you see them out and about. However, you do need to be aware of how to store your food and scented items appropriately because the bears are highly sensitive to them. They are even strong enough to break into cars.
In addition, bear spray is illegal in Yosemite, so you just need to understand why and be aware of what to do in an unexpected bear encounter. I have this article here that might help you.
Do I need a reservation to enter Yosemite National Park?
No – as of 2026, reservations are no longer required to enter Yosemite National Park. Yosemite announced it will no longer use a timed reservation system in 2026, following a comprehensive evaluation of traffic patterns, parking availability, and visitor use during the 2025 season.
Even without a reservation system, Yosemite gets very busy. If you can, try to visit during weekdays, arrive early (before 9am), and explore destinations outside Yosemite Valley, including Tuolumne Meadows, Wawona, and Hetch Hetchy.
Conclusion – making the best use of one day in Yosemite
A day trip to Yosemite is enough to experience its iconic waterfalls, granite cliffs, and unforgettable valley views, especially if you plan your route well. To make the most of your time, it’s best to arrive early and consider staying close to the park the night before.
Ever since my first California road trip, Yosemite continues to be my favorite national park in California, and even a day trip can be epic. It’s also a great destination in winter.
Remember to adjust this itinerary based on the daylight hours you have and keep things flexible. If you’re able to extend your trip, I highly recommend spending at least two days in Yosemite to explore at a slower pace and venture beyond the valley.
Although this itinerary aims to help first-time visitors make the most of a day trip, here are additional activity ideas for repeat visitors:
- Mariposa Grove of Giant Sequoias
- Tuolumne Meadow via Tioga Pass
- Longer day hikes – e.g. Upper Falls Trail, Four Mile Trail to Glacier Point, Clouds Rest, Half Dome, and more
- Camping in Yosemite Valley
If you’re visiting in October or November, you’ll want to check out the best spots for fall colors.


