
Yosemite 2-Day Itinerary: The Best Sights For Weekend Warriors
How do you plan a weekend Yosemite National Park itinerary that features all the best sights?
Perhaps you can’t get off work early enough on most Fridays, but you don’t want to delay your Yosemite trip any longer. In this post, I will share a weekend itinerary where you can leave for Yosemite on Saturday morning and come back on Sunday evening.
Even though 2 days is relatively short, you can still cover a lot over the weekend. For example, you can hike up to Yosemite Falls, relax at camp, chase the sunset at Sentinel Dome, and more. It is also possible to make it a low cost trip so that you don’t need to spend much to make this drive out.
If you’ve always wanted to visit Yosemite National Park over the weekend but don’t know how to make a 2-day itinerary work, I hope this article helps you to plan your next summer or fall trip. You can also refer to this video for our Yosemite itinerary.
- Recommended Yosemite 2-Day Weekend Itinerary
- How many days should you spend in Yosemite?
- What is the most popular time to visit Yosemite
- How to get to Yosemite
- Getting around Yosemite
- How to get the most out of a 2-day Yosemite itinerary
- Where to stay in Yosemite for a 2-day trip
- What to bring for a Yosemite trip
Recommended Yosemite 2-Day Weekend Itinerary
There are many ways to put together a 2-day weekend itinerary to Yosemite, but this is our favorite way for a late summer/early fall adventure.
In this itinerary, you get to take on the challenge of tackling switchbacks up Yosemite’s granite walls for a stunning viewpoint overlooking the valley. You can also go on relaxing walks to soak in the majestic scenery from Yosemite Valley.
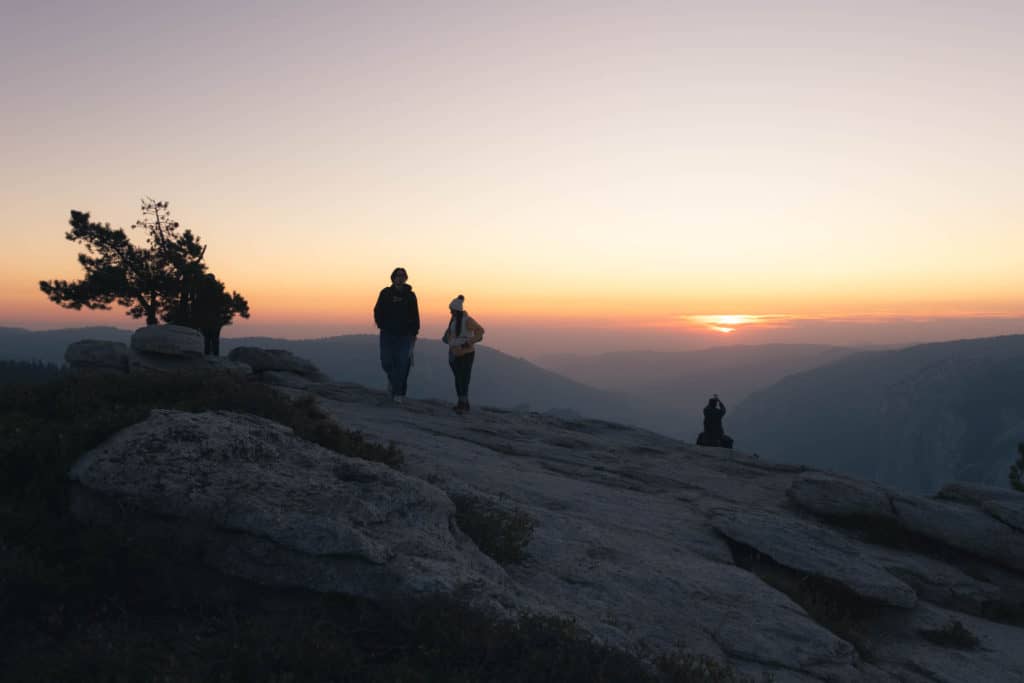
The most magical experience will undoubtedly be to watch a sunset from the top of the cliffs, surrounded by the panoramic view.
We will use Yosemite Valley as our base for exploring the hikes and viewpoints in both the valley and along Glacier Point Road.
The cheapest way to stay in Yosemite Valley is by reserving a campsite on recreation.gov. Upper Pines Campground is the most popular one – which also means you should book it 5 months in advance if possible.
1. Hike the Upper Yosemite Falls Trail to Columbia Rock

Try to arrive at the park by 9am, so that you can beat the weekend traffic and start hiking when the weather is not yet too hot.
The hike to Columbia Rock starts from the Upper Falls trailhead near Yosemite Valley Lodge/Yosemite Falls Parking (shuttle stop #7). It is a short but tiring hike because of the many switchbacks you will take to gain elevation above the valley floor.
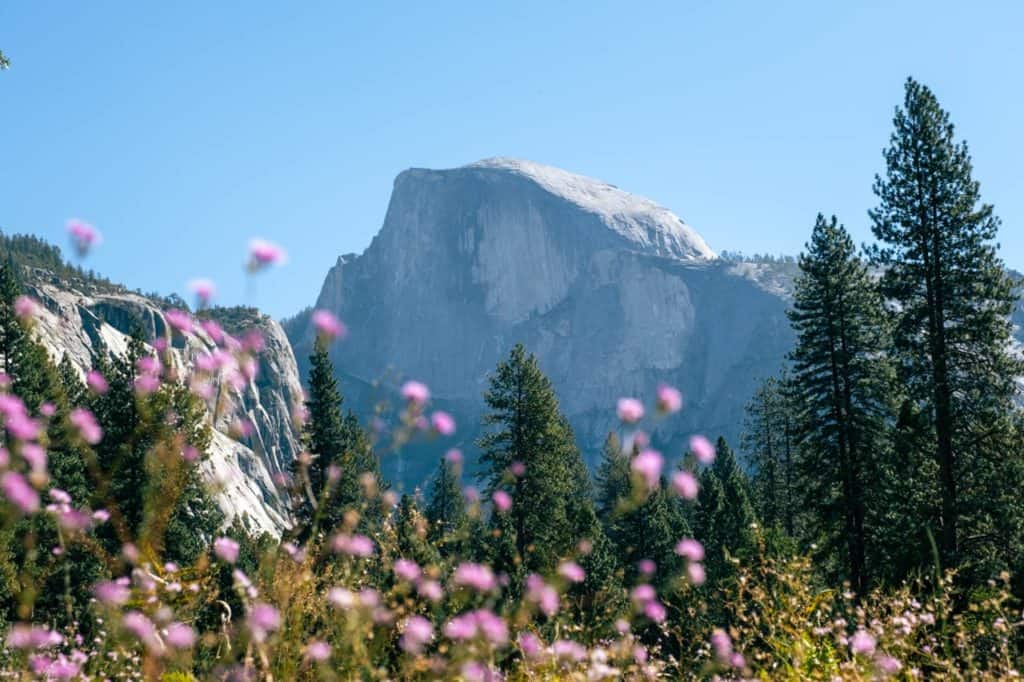
Nonetheless, it is so worth it because the view keeps getting better as you go higher. There is a nice lookout point to take pictures at Columbia Rock and if you go in winter you can also see parts if the valley covered in snow.
It will take 1.5 to 2 hours for a round trip hike to Columbia Rock, covering a distance of 2 miles and elevation gain of about 1,000 ft (300 m).
2. Visit the Lower Falls and Visitor Center
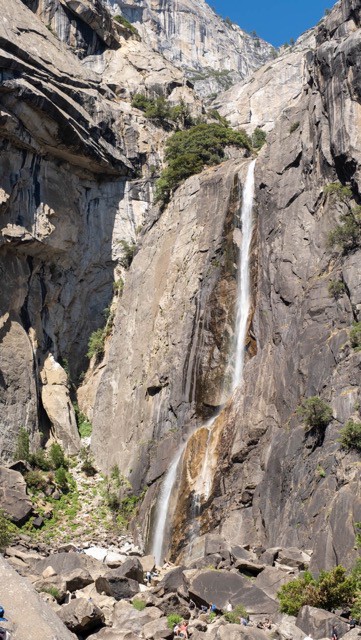

After descending from the Upper Falls trail, you can walk about 1 mile or 20 minutes to the Lower Falls viewpoint. If you walk through Camp 4, you get to watch rock climbers working on routes along Swan Slab.
The walk will be partially shaded and it is an easy path to the Lower Falls Vista Point. I can just imagine how crowded the Lower Falls viewpoint will be during summer when the waterfall is gushing!
Next, walk another 10 minutes to the Yosemite Visitor Center where you can buy souvenirs and learn more about Yosemite’s geology and history. Look out for any ranger-led programs available for the day that you visit. They can be things like stargazing events, walking tours, and other educational events that may appeal to kids.
3. Check in at campsite and have lunch

Campsites at Yosemite National Park tend to be ready for check in around 2pm after the previous occupants have left. If you are at Camp 4, you may be able to check in from 12pm such that you can set up camp first before exploring Lower Falls and the Visitor Center.
After setting up your tents, this is a good time to have lunch to fuel your next half of the day. If you have your portable camping stove, you can cook and eat at the picnic tables in your campsite. After that, make sure to put all your food and scented items in the bear locker before you leave the area.
4. Drive up Glacier Point Road to Washburn Point
Pack along some snacks and energy bars, and let’s head up to Glacier Point Road! Starting from Yosemite Valley, it will take 1 hour to drive to Glacier Point and Washburn Point.
This drive will pass by the famous Tunnel View though it may be quite crowded in the afternoon. Instead, we will leave it for sunrise the next day.
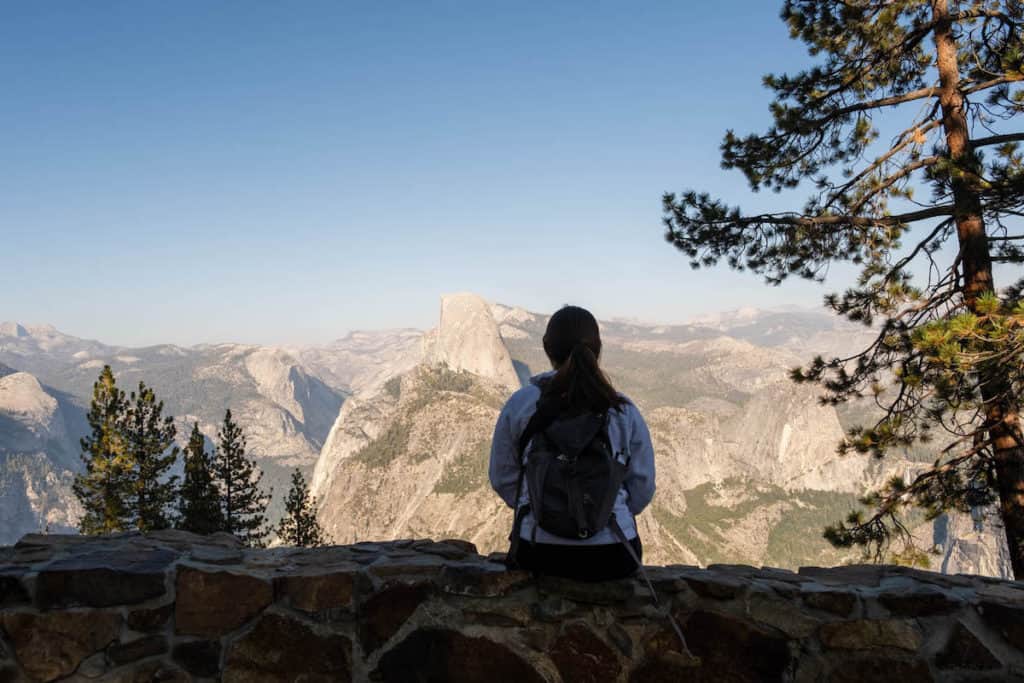
After a stretch of winding roads, it’s an amazing feeling to step out of the car and car to see the majestic view of Half Dome, Vernal and Nevada Falls, and the surrounding cliffs from Washburn Point. We noticed that it felt less crowded than the valley floor and were thankful for it. You can snap some nice photos with the scenery here and take a quick break from the drive.


As you continue driving from Washburn Point to Glacier Point, you’ll pass by the classic photography spot along a winding road bend where Half Dome is revealed in the background.
If you want to catch some shots here, it is a good idea to leave your car at either Washburn Point or Glacier Point Parking and walk 10 minutes to this spot. That’s because there is no designated parking here and it can be dangerous to park along the side of this sharp bend.
You can also make a quick stop at Glacier Point and walk a short distance from the parking lot to the viewpoint if you have time. If not, it is fine to skip it because Washburn Point is essentially the quieter version of Glacier Point.
5. Hike to Sentinel Dome for an epic sunset

Next, drive over to the Sentinel Dome trailhead which is in the direction that you came from earlier. I recommend arriving at the parking lot 2 hours before sunset so that you have ample time to make the hike to Sentinel Dome.
The hike to Sentinel Dome takes 1.5 to 2 hours as a round trip, covering 0.9 miles (1.5 km) each way and gaining 400 ft (125 m) in elevation. However, we will take a longer time than that since we want to watch the sunset at the top.
It will be extra useful to have a map with you (offline or physical) as there are no trail maps along the way. The terrain is sandy with a mix of rocky slopes at the start, and evolves to a scramble up the side of Sentinel Dome as you get near the top. It is generally an easy to moderate trail, and you just need to wear shoes with good grip so that you don’t slip on the rocks.


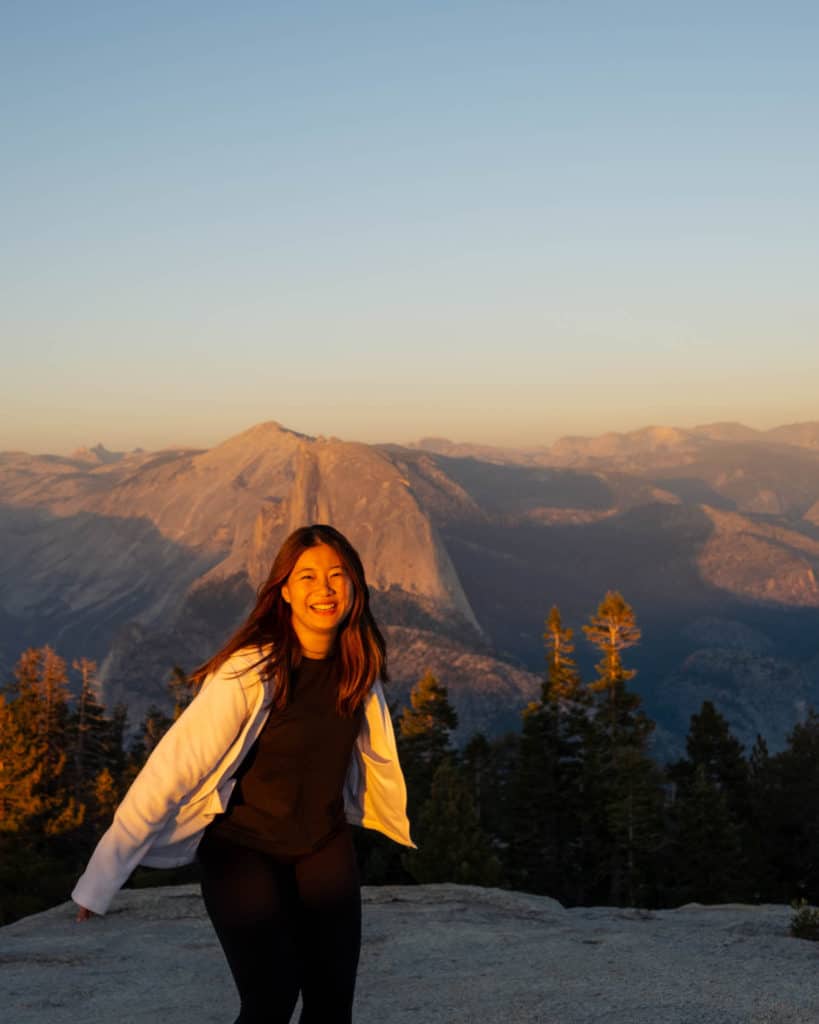
After about 1 hour you’ll reach the top of Sentinel Dome, where you get a 360-degree panoramic view of the high sierras. I’m not kidding, you can actually walk across the top of Sentinel Dome to check out different viewing angles. It was the best feeling to see the orange hues of the sunset hit the side of Half Dome, and the lighting was perfect for photography.
Finally, drive back down to Yosemite Valley for the night and enjoy dinner and relaxing at the campsite. Thankfully, most of the crowds from the day would have already left.
6. Sunrise at Yosemite Valley View and Tunnel View


The early bird catches the worm – so let’s go catch the sunrise at Valley View and Tunnel View.
Valley View features the Merced River in the foreground with the famous El Capitan in the background. As the sun rises, you get to witness the sun rays hit the Dawn Wall of El Capitan. On a cloudy morning, the sunrise turns the sky a gorgeous color and is worth waking up early for.
Alternatively, you can head to Tunnel View for a broader view of the valley and capture several of Yosemite’s landmarks in one photo. The sunrise lighting is not as harsh as the midday sun, making it a great opportunity to capture beautiful shots at Tunnel View.
7. Breakfast at campsite and pack up

After sunrise, enjoy a slow morning at your campsite as you enjoy breakfast and coffee. If your camping gear got damp from mildew, give them some time to air dry before packing up. Check out is generally at 12pm, which means you can leave your car at the campsite till then.
8. Stroll through Cook’s Meadow, or hike Mist Trail
Depending on how much energy you have after the previous day of activity, you can choose an easy stroll at Cook’s Meadow or take on the Mist Trail hike. You may need to leave your campsite early to get parking at the nearest parking lot near the trail.

If you’re looking to take it easy, Cook’s Meadow Loop (shuttle stop #5 or #6) is a pleasant 1 mile (1.6 km) loop that takes only 30 minutes. You get to enjoy effortless views of Half Dome, El Capitan, Sentinel Rock and Glacier Point. Nearby, you can also check out Yosemite Chapel and the Sentinel Bridge.
If you decide to hike the Mist Trail, you can hike up to the distance that is comfortable for you. Mist trail hiking (shuttle stop #16) distances based on ending point:
- Vernal Falls footbridge: 1.6 mi (2.6 km) round trip with 400 ft (120 m) elevation gain, takes 1-1.5 hours
- Top of Vernal Falls: 2.4 mi (3.9 km) round trip with 1000 ft (300 m) elevation gain, takes 3 hours
- Top of Nevada Falls: 5.4 mi (8.7 km) round trip with 2000 ft (610 m) elevation gain, takes 5-6 hours
Take this time to soak in all the beauty you’ve experienced these 2 days in Yosemite, because it’s time to head back home. Now you can start planning your next Yosemite itinerary – perhaps a backpacking trip to explore the backcountry, or to climb Half Dome.
How many days should you spend in Yosemite?

Yosemite National Park is a very big area, offering lots to do and different landscapes to explore. The different areas of Yosemite are mainly:
- Hetch Hetchy (Northwest)
- Glacier Point (Central)
- Yosemite Valley (Central)
- Wawona and Mariposa Grove (South)
- Tuolomne Meadows (East)
- Tioga Road (East to West)
The most popular area to explore is the Yosemite Valley, where you have many amenities and shuttle services available. It is also open all year round, making it the top choice for first-timers. Areas with higher elevation like Tioga Road and Glacier Point Road are closed during winter, so they can get very busy during the warmer seasons.
The number of days you should spend in Yosemite depends on the type of activities you want to do, your interests, and how much of the park you want to explore. Here are some recommended durations for different types of Yosemite trips.
- Day trip: Focus on easy viewpoints in Yosemite Valley or Glacier Point as they can be reached by driving
- Weekend trip (2-3 days): Explore each area in more depth, go on hikes and enjoy camping
- Extended visit (4-6 days): Tackle some difficult hikes and visit multiple areas of the park, perhaps even camping in the back country
Will 2 days be enough for a Yosemite itinerary?

It takes about an hour to get from one part of Yosemite to another. If you only want to focus on one or two areas of the park, 2 days will be just the right amount of time to spend in Yosemite.
That is also a practical way of spending the valuable weekend, where we have more time exploring the attractions and less time driving. If you are up for it, you can also consider tackling one big hike each day as long as you start early. Ideally, you would also be staying in the park to reduce the time spent driving in and out.
What is the most popular time to visit Yosemite

The most popular time to visit Yosemite National Park is in the warmer seasons from June to October. This also coincides with summer holidays and the time when Tioga Road and Glacier Point Road are open.
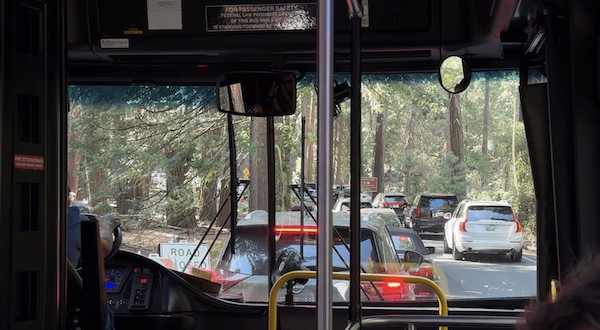
However, the popularity in summer comes with some downsides. In summer 2023, traffic in Yosemite got so congested that if you arrive after 9-10am, you can expect wait times up to a few hours just to get into the park to find parking. If Yosemite Valley runs out of parking spots, you may also be turned away and redirected towards other parts of the park.
Each season has its own beauty no matter when you visit. The best time to experience Yosemite for you depends on your travel preference. For this itinerary, we will be focusing on the options available during the Summer to Fall season. You can also check out my winter Yosemite itinerary if you’re planning to visit in the colder months.
Spring (April to May): Pleasant weather, wildflowers, the beginning of waterfall flows
Summer (June to August): Access to higher elevation viewpoints and hikes along Tioga Road and Glacier Point, peak waterfall flows
Fall (September to October): Fall foliage, reduced crowds, last chance to access Tioga Road and Glacier Point
Winter (November to March): Snowy landscapes, winter activities, much fewer people.
Read more:
Do I need a reservation to enter Yosemite National Park?
You might need to make reservations to enter Yosemite National Park if you don’t have a campsite or accommodations inside the park.
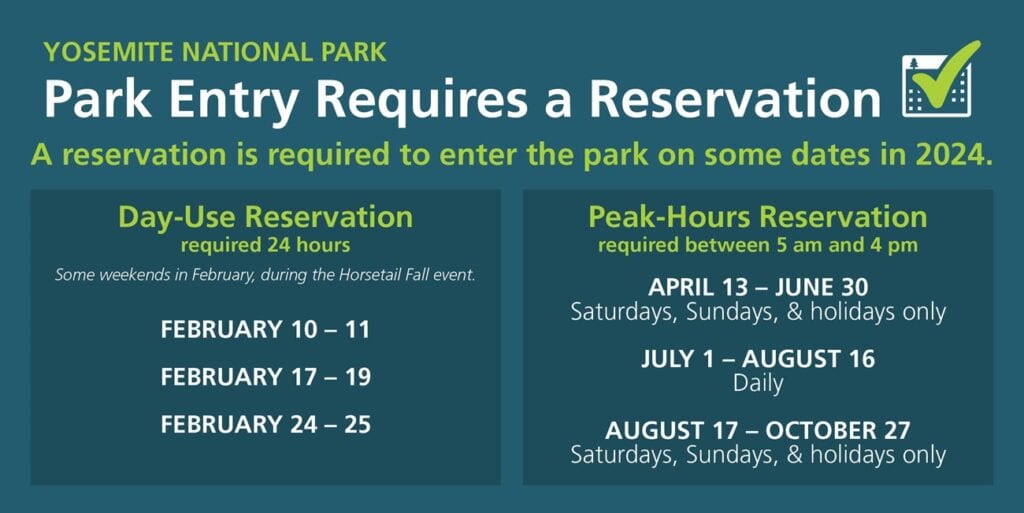
Each vehicle will need to make payment for a $2 non-refundable reservation online via the official booking system in order to enter the park between 5am to 4pm. Even if you’re just driving through the park, you will still need a reservation to get through to the Sierras.
This applies for the following dates in 2024, according to NPS:
- April 13 to June 30 (weekends)
- July 1 to August 16 (daily)
- August 17 to Oct 27 (weekends)
When can reservations be made?
The reservation slots are released on January 5, 2024 at 8am, and will be available until they sell out. There will be additional reservation slots released 7 days before each day as well, so better suit those who are making last-minute plans.
Firefall reservations for Yosemite in February
This is in addition to the usual Firefall reservations in February, though the concept is similar. During the second half of the month, reservations are required for 24 hours of entry into Yosemite.
- February 10 to 25 (weekends)
- February 19 – Washington’s Birthday
How to get to Yosemite
The easiest way to get to Yosemite is by car – 4 hours from San Francisco or 6 hours from Los Angeles. This itinerary assumes that you have access to a car, whether it’s your own or a rental car.
Alternatively, you can rent an RV or camper van along with the appropriate campsite booking, so that you have the option to also sleep in your vehicle.
Take note that CA-140 is the preferred route in winter because of the less windy roads with lower chance of heave snow conditions. Of course, do check road advisory (including snow chain requirements) before heading out.
Avoiding weekend traffic getting in and out of Yosemite
One of the best things you can do for your weekend Yosemite trip is to leave very early in the morning to start the road trip.
National Parks Service (NPS) recommends getting to the park entrances before 8am to avoid delays related to traffic and parking issues. If you’re coming from the San Francisco Bay Area, that means you should leave home before 4:30am on Saturday morning. Make sure that you start packing from Thursday so that you can rest early on Friday night.
Another great way to avoid the weekend traffic would be to book a campsite inside the park so that it reduces the need for daily entrance and exit, specially during peak hours. You will also get designated parking which puts you more at ease as you won’t need to wait around for parking in the middle of the day.
Getting around Yosemite
Being able to navigate through Yosemite National Park smoothly will definitely make your trip more enjoyable. There are a few transportation options for visitors to explore the different areas of the park.
The best way to get around Yosemite Valley is via the free shuttle service, walking, or bicycling. This is because parking spots are limited at most areas in Yosemite and you don’t want to worry about parking all day.
Yosemite Valley Shuttle
- Departure times: 7am to 10pm daily
- Availability: every 12 to 22 minutes
If you are visiting for the first time, Yosemite Valley is probably where you will be spending most of your time. The Yosemite Valley Shuttle provides an easy way to get around as it loops around the valley floor from the El Capitan Meadow to the Mist Trailhead at regular intervals.
- Pros: Free and convenient way to get to the major attractions in Yosemite
- Cons: Can get very crowded with long lines and delays during peak periods
You can also opt for bus services to take you to places outside of Yosemite Valley, though you will need to check the operation times, schedules, and fees required.
Glacier Point Tour
- Duration: 1.5 hours one-way
- Departure times: 8:30am and 1:30pm
- Availability: closed in 2023 – usually once/day from late May to October
- Cost: $28.50 for adults, $18.25 for children (one-way)
You can also hop on a bus to Glacier Point from Yosemite Valley Lodge in the morning. After that, you can either return to the bus for the ride back or hike down to the valley via the Four Mile Trail or Panorama Trail. Make sure to check for availability and book your tickets in advance.
- Pros: Get to the famous Glacier Point without driving
- Cons: Does not stop at other trailheads along the way, and last ride to the valley is quite early
Yosemite Valley – Tuolumne Meadows Hikers’ Bus

- Duration: 2.5 hours to 3 hours one way
- Departure times: 8am to 10:35am, and 2:05 to 4:15pm (schedule depends on pick-up location)
- Availability: once/day from mid June to early September
- Cost: $5 to $14.50, free for children (one-way, depending on the distance travelled)
For more hiking options in the alpine Tuolumne Meadows, you can take the hikers’ bus from Yosemite Valley to get to different trailheads along Tioga Road. You will also need to purchase tickets in advance in order to guarantee seating, make sure to account for this while planning your Yosemite itinerary.
- Pros: Access many more hiking trails and lakes without driving
- Cons: Takes a much longer time than driving because of the various stops, hikes are limited by the bus schedule
Tuolomne Meadows Shuttle
- Departure times: Every 30 minutes from 7am to 7pm
- Availability: closed in 2023 – usually mid June to mid September
- Cost: $1 to $9, free for children (one-way, depending on the distance travelled)
In case you want to include Tuolumne Meadows into your Yosemite weekend itinerary, you can also consider the shuttle that takes you between Tuolumne Meadows and Olmsted Point.
- Pros: Great way to explore hiking trails with different start and end points, and relatively frequent bus services
- Cons: Uncertainty about whether it will be available for the next year
How to get the most out of a 2-day Yosemite itinerary

Given that there is so much to see and do in Yosemite, how can we maximise our time to enjoy what Yosemite has to offer?
We don’t want to cram too many activities in 2 days as that will make it exhausting. However, we want to make sure that we plan in advance so that we can focus on what will be most fun for us.
Ideally, a rewarding 2-day Yosemite itinerary would have a nice amount of hiking, relaxing walks, and looking out from epic viewpoints.
What to see for the first time in Yosemite
Among all the great natural landscapes and sights to explore in Yosemite, there are a few popular options for first time visitors to Yosemite.
Yosemite Valley
- Viewpoints: Tunnel View, El Capitan Meadow, Cook’s Meadow
- Top hiking trails: Mist Trail to Nevada Falls (5-6 hours), Yosemite Upper Falls Trail (6-8 hours), Half Dome (10-12 hours)
Glacier Point
- Viewpoints: Washburn Point, Glacier Point
- Top hiking trails: Four Mile Trail (3-4 hours one way), Sentinel Dome (2 hours)
Tuolumne Meadows and Tioga Road
- Viewpoints: Olmsted Point, Tenaya Lake
- Top hiking trails: Cloud’s Rest (6-8 hours)
Mariposa Grove of Giant Sequoias
- Top hiking trails: Grizzly Giant Loop Trail including California Tunnel Tree (1.5-2 hours)
Where to stay in Yosemite for a 2-day trip
You could stay in the location where you will be doing your bigger hikes, since that will be able to give you an early head start the next morning.
Check out this blog post for more detailed planning tips on where to stay in Yosemite.
Accommodations in Yosemite Valley
For many, the best hikes like Half Dome and Upper Yosemite Falls can be accessed via Yosemite Valley, which is why it is such a popular destination. There are also many amenities available in Yosemite Valley, including the Village Store, restaurants, and free shuttle service.
Budget $: Campgrounds (Upper Pines, Lower Pines, Camp 4, Hodgdon Meadow)
Mid-range $$: Yosemite Valley Lodge, Curry Village
Luxury $$$: Ahwahnee Hotel
Accommodations in Wawona
If you are unable to find any hotel availability in Yosemite Valley, you can also consider the quieter option of Wawona. Wawona is located south of Yosemite Valley, 50 minutes away via Wawona Road. This is also where you can find one of the oldest mountain resorts in California – the historic Wawona Hotel.
Budget $: Wawona Campground
Mid-range $$: Vacation rentals
Luxury $$$: Wawona Hotel
Accommodations outside Yosemite
You may also find more accommodation options just outside the Yosemite National Park entrances. These options are also great for if you decide to extend your trip to explore outside the valley.
El Portal along CA-140 (25 minutes from Yosemite Valley):
- Yosemite View Lodge
Between Groveland and Big Oak Flat Entrance (<1 hour from Yosemite Valley):
- Rush Creek Lodge at Yosemite
- Evergreen Lodge at Yosemite
- Yosemite Westgate Lodge
Midpines along CA-140 (1 hour from Yosemite Valley):
- AutoCamp Yosemite
- Zen Yosemite by BnB Yosemite
Fish Camp along CA-41 (1 hour 5 minutes from Yosemite Valley):
- Tenaya Lodge at Yosemite
What to bring for a Yosemite trip
For a 2-day Yosemite itinerary, you only need to bring a few types of things along. These will also apply to any other weekend trip that you go on. Refer to this article for more details and tips on things to bring to Yosemite.
Clothes: Check the weather forecast and prepare clothes and layers accordingly.
- Prepare for fast changing weather by layering clothes. E.g. Long-sleeved shirt, fleece jacket, waterproof jacket etc
- Swimsuit and flip-flops for swimming in rivers or lakes
Sun protection: To avoid going back with a sun burn
- Sunscreen
- Sunglasses and cap
Hiking essentials: For taking long walks and daily exploration
- Day pack to carry water, snacks, layers, and more
- Hiking shoes with good grip
- Water bottle and snacks/lunch
- Hiking poles
Navigation and safety: The most commonly overlooked aspect of a weekend trip
- Insect repellent for summer months
- Water filter in case you can’t find drinking water
- First aid kit
- Flashlight for when it gets dark
- Offline maps and a physical map
Photography equipment: To bring memories back home (and take hiking selfies)
- Camera (fully charged)
- Tripod
- Extra batteries and memory cards
Camping gear and road trip: Check out my detailed articles about my camping packing list and road trip essentials
Check out other epic adventures:
- The Perfect 7-Day Grand Circle Road Trip (USA)
- The Ultimate 10-Day Road Trip You Need: Best Of Highway 1, Yosemite, Lake Tahoe
- The Best Pescadero Weekend Itinerary for Hiking and Camping
- How To See Lassen Volcanic National Park: Weekend Itinerary
- California Coastal Road Trip: Best Places You Need To Stop At
- Catalina Island Hiking & Camping Guide (Two Harbors to Little Harbor)
- 10 Must-Go Places In California – An Outdoor Enthusiast’s Guide
- Perfect Christmas Cabin Rentals In California For The Best Getaway
- How To See Lake Tahoe: 2-Day Itinerary You Need
- 5 Best Places In Northern California For Camping
- The Perfect Big Sur Road Trip Itinerary For Best Camping
Janice
Janice, a California-based travel writer from Singapore, discovered her love for hiking and camping during her studies in Los Angeles. Through her blog, she now shares detailed itineraries for adventures in California, Asia, and beyond. She also talks about gear recommendations and tips for beginners, hoping to inspire them to explore the great outdoors with confidence.


You May Also Like

Where To Stay In Rovaniemi: Best Lapland Accommodations

Beginner Hut-To-Hut Hiking Trails You Need To Try
