
The Perfect 7-Day Grand Circle Road Trip (USA National Parks)
Planning a 7-day Grand Circle road trip from Las Vegas to visit several National Parks? It can be overwhelming trying to decide the routes and drive times for a realistic one-week trip. The classic Grand Circle route through Utah and Arizona can easily stretch to 10–14 days. But if you plan it strategically, you can experience the highlights in 7 days.
We did this trip when my family visited from abroad, and after researching dozens of routes, this itinerary struck the right balance without being too rushed. This 1 week Grand Circle road trip itinerary is best for travelers flying in to Las Vegas who want to explore several national parks with manageable driving days.
You’ll have an optimized route that covers the must-see highlights: Grand Canyon, Zion, Bryce Canyon, Antelope Canyon, and Horseshoe Bend. Overall, it’ll have minimal backtracking, family-friendly hikes, and convenient overnight stops. I’ll show you how exactly what you’ll need to book, where to stay each night, and best hikes in each destination.
This article uses affiliate links where I make a small commission if you make a purchase through my links, at no additional cost to you. As an Amazon Associate I earn from qualifying purchases.
Book these first for your Grand Circle road trip
🚙 Book a rental car: DiscoverCars
🚐 Rent an RV: Outdoorsy
🏨 Las Vegas Bellagio Hotel
🎟️ Antelope Canyon tours (sells out early)
🎫 National Park Pass
About this 1 week Grand Circle road trip itinerary
There are many versions of the Grand Circle road trip, depending on where you’re starting from. In our case, since we’re starting from Las Vegas, our version of the Grand Circle road trip is almost like a 7-day National Park tour from Las Vegas.
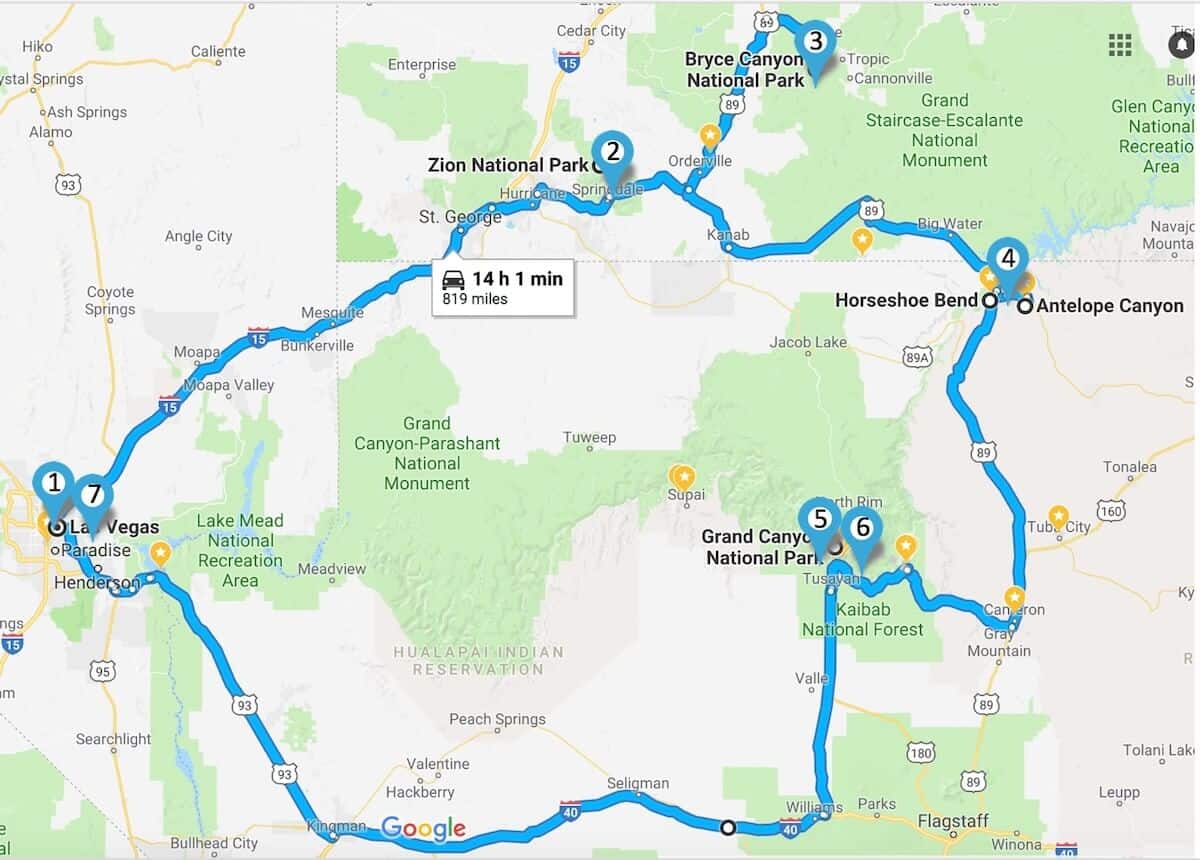
1 week Grand Circle Road Trip itinerary map
Here’s an overview of the places we will be visiting. It can also be considered a Grand Canyon road trip because it’s mostly focused on the national parks and attractions nearby. It covers a total of just over 800 miles for the loop.
Drive Times (Las Vegas – Zion – Bryce Canyon – Page – Grand Canyon – Las Vegas)
- Las Vegas → Zion: 2 hr 30 min (150 miles)
- Zion → Bryce Canyon: 2 hr (85 miles)
- Bryce → Page (Antelope Canyon): 2 hr 45 min (150 miles)
- Page → Grand Canyon South Rim: 2 hr 30 min (135 miles)
- Grand Canyon → Las Vegas: 4 hr 30 min (280 miles)
Ending at the Grand Canyon gives your trip a dramatic finale and simplifies your return to Vegas.
Where to stay on a 7-day Grand Circle road trip
|
Night |
Location |
Best for |
Top Pick |
|---|---|---|---|
|
1 |
Las Vegas |
Arrival |
|
|
2-3 |
Near Zion |
Location convenience |
|
|
4 |
Marble Canyon |
Antelope Canyon |
|
|
5 |
Grand Canyon National Park |
Sunrise |
|
|
6 |
Las Vegas |
Comfort |
What are the Grand Circle National Parks?
- Zion National Park
- Bryce Canyon National Park
- Grand Canyon National Park
- Capitol Reef National Park
- Canyonlands National Park
- Arches National Park
- Mesa Verde National Park
- Petrified Forest National Park
Other popular attractions:
- Antelope Canyon
- Horseshoe Bend
- Lake Powell
- Monument Valley
Some variations of the Grand Circle road trip can take up to 2 weeks to cover up to 8 National Parks and destinations (like Moab, Monument Valley, or Capitol Reef). However since we only have one week, trying to include everything usually means too much driving and not enough exploring.
The ones we chose (bolded in the list) are the closest to each other as well as to Las Vegas, so we’re focusing on those for our 1 week Grand Circle road trip itinerary.
Best time to do the Grand Circle Road Trip
The best time for a Grand Circle Road Trip is just outside summer -from March to May, or September to November. This is when the weather is mild, which we experienced when we visited in May.
At night, the temperatures were just above freezing, but it felt alright when we were out camping. During the day, it was sunny and we felt warm but not weighted down by the heat while hiking.
For example, you can check the monthly temperature ranges at different parts of the Grand Canyon here. If you’re there closer to winter time, you may even get to see some snow!
What type of vehicle to drive the Grand Circle road trip
This is one the most popular road trips in the US because of the spectacular views and scenic drive. I am so thankful for the opportunity to do this with my family during spring. We rented an SUV for this trip, which was perfect for 4 of us.
Another cool thing to do would be renting an RV or campervan from Outdoorsy, a peer-to-peer camper rental community. That way, you can try out van life without committing to buying one, and it will already be built up for you. Check out the options near your location or Las Vegas and book in advance for the best prices and options!
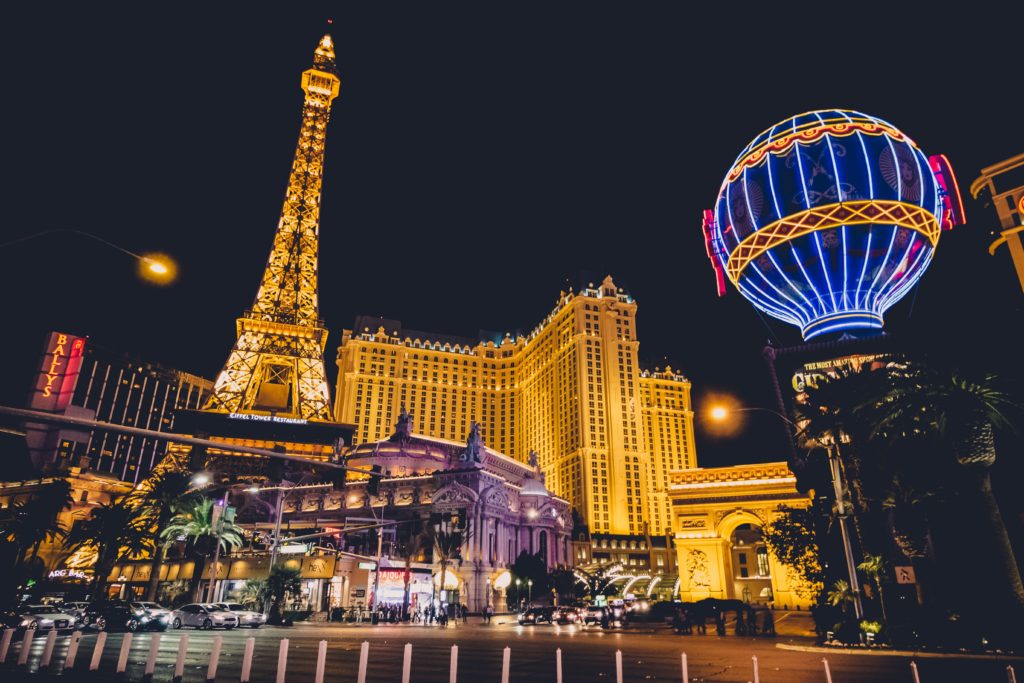
Day 1: Arrive in Las Vegas
Las Vegas can be reached via a flight or drive. If you only have 7 days, I recommend resting from the jet lag, and choose to fly in to Vegas rather than drive.
On this first night, have a good dinner and rest up before the hiking and exploration begins. Hit up any of the restaurants in Vegas, such as Bardot Brasserie, Bazaar Meat, and Mon Ami Gani etc. If you arrive early enough, consider having a sumptuous buffet, since many of them open till 9pm.
Where to stay in Las Vegas:
In terms of budgeting, I suggest going for a cheaper hotel at the start, and splurge at the end of the Grand Circle road trip loop. We stayed at Excalibur Hotel, a 3.5-star hotel in the heart of the Strip. Check latest prices on here.
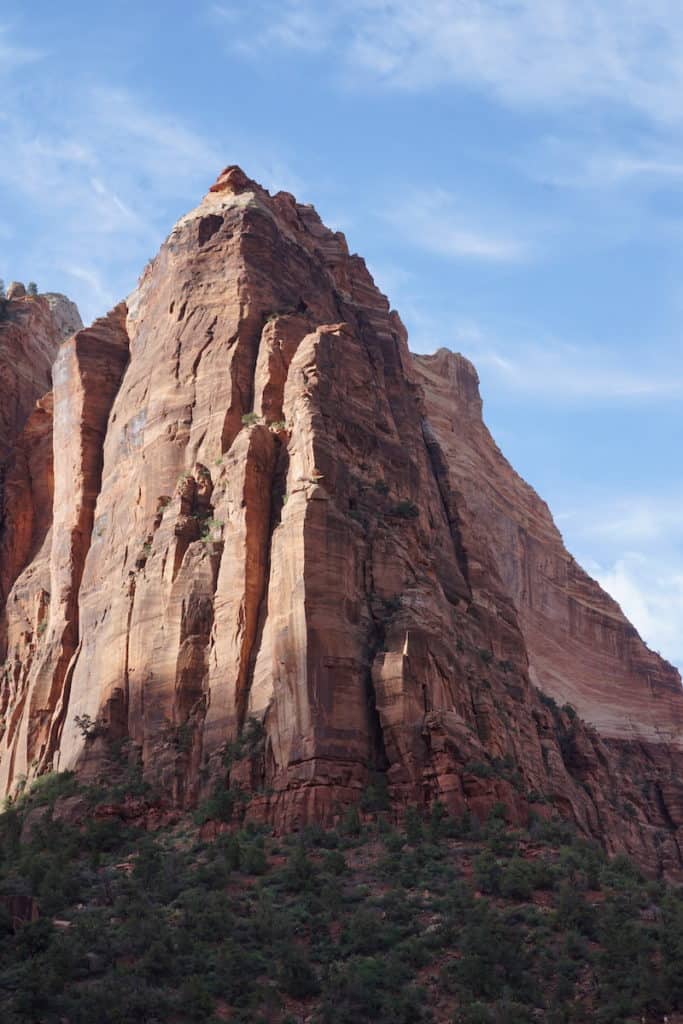
Day 2: Las Vegas to Zion National Park
The first hikes in our Grand Circle road trip will start today. Zion National Park is a short 2.5 hour drive from Las Vegas. You could easily do a day trip to Zion National Park if you want to do 1 short hike during the day. If you have time, I suggest making a 1-hour detour to drive through the Valley of Fire State Park, a route that promises breathtaking scenery and towering rock formations.
Best hikes in Zion
Lower Emerald Pools trail (2 hours) is perfect for a family, as it is easy enough but also exposes you to the spectacular landscape of Zion every way you turn.
Other popular trails are the Angel’s Landing, and hiking the Narrows, which are more time consuming and spending more than 1 day in Zion might be a better idea for those who are up for the challenge.
Best places to stay near Zion
If you’re looking for hotels near Zion National Park, here are some cool places to consider:
- Best for luxury glamping: Zion Glamping Adventures
- Best location for Zion: Best Western Plus Zion Canyon Inn & Suites
- Best for mid-way stop: Glendale vacation rentals
We opted to stay in Glendale, Utah for 2 nights, as it is conveniently situated between Zion National Park and Bryce Canyon National Park. This way, it can be our base before and after we explore Bryce Canyon. It’s also more affordable compared to staying near the National Parks’ entrances.

Day 3: Bryce Canyon National Park
Bryce Canyon is a slightly smaller park, but there are many lookout points (sunrise point, sunset point, etc.) that are worth stopping by on the way to hiking trails. Hoodoos are the highlight of this park, pillar-like structures that have been brought about by various forms of erosion. Truly a geography lesson.
Best hikes in Bryce Canyon
The most popular and doable trail is the Queen’s Garden and Navajo Loop trail (2-3 hours), where you descend down into the canyon, allowing you to get up close and personal with the Hoodoos, and view them from a different perspective. The landscape is almost unearthly, but very interesting to explore.
Where to stay near Bryce Canyon
If you prefer to stay near Bryce Canyon, here are some stays to consider – depending on your budget:
- Affordable: The Riverside Ranch Motel
- Mid-range: Best Western PLUS Bryce Canyon Grand Hotel
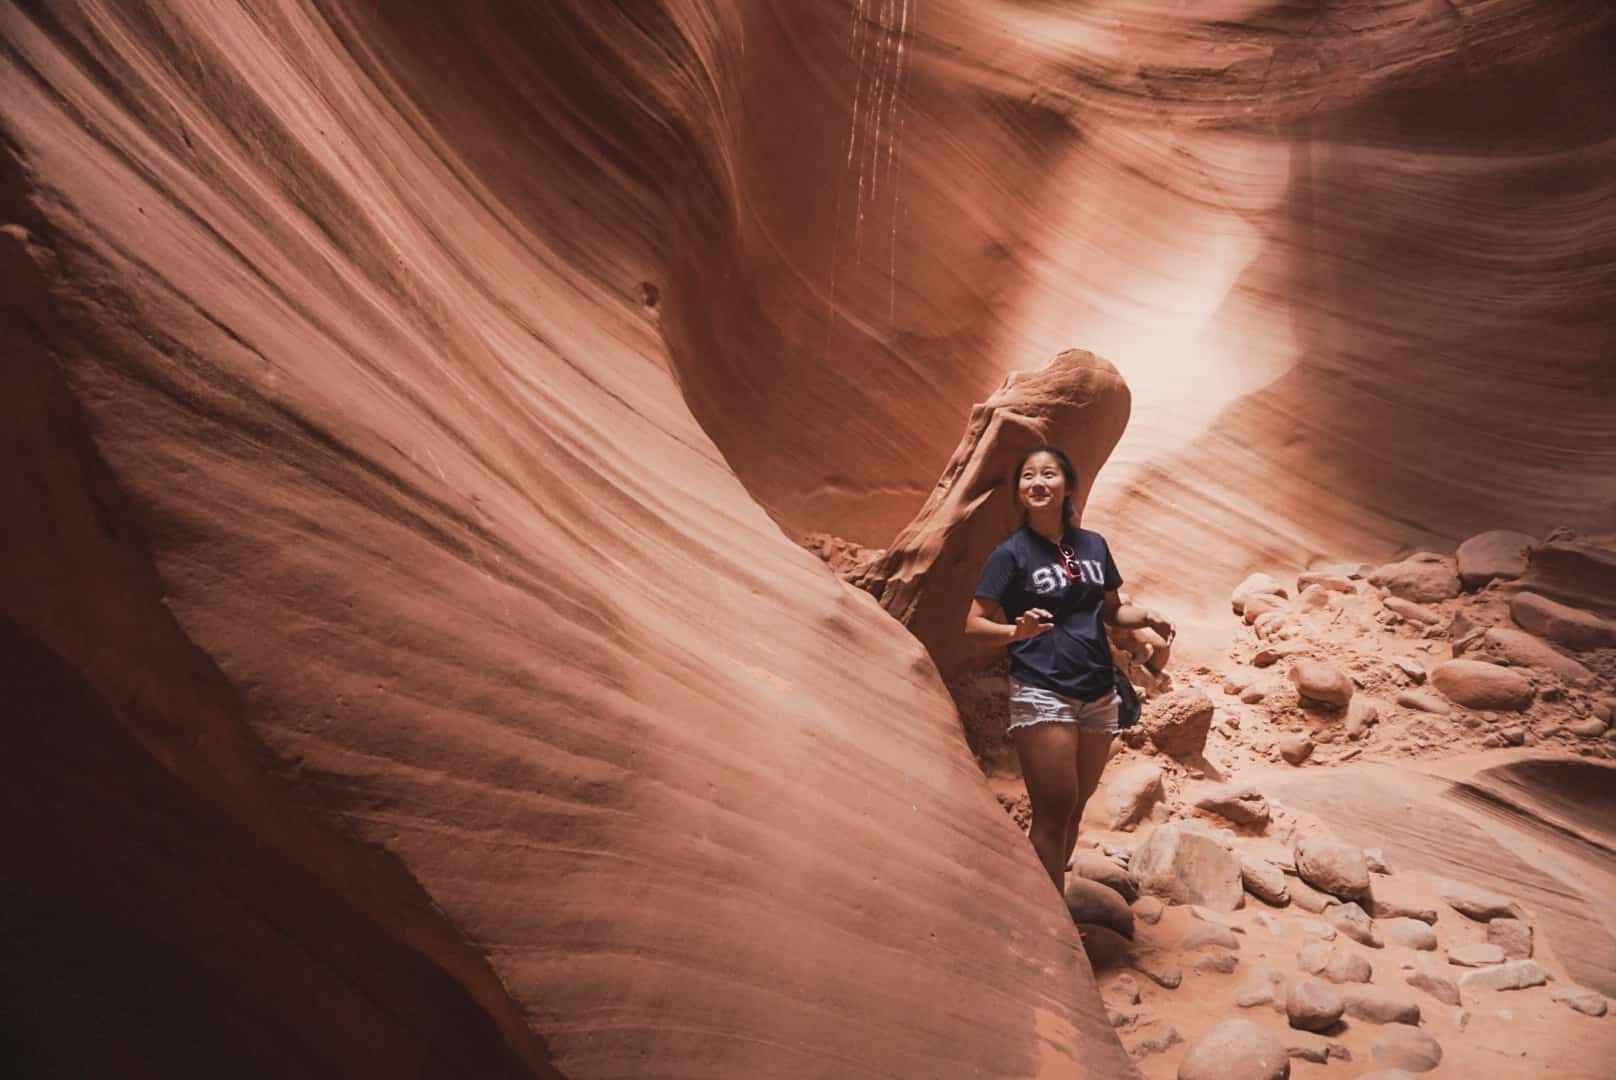
Day 4: Antelope Canyon, Horseshoe Bend
If you do only one paid experience on this trip, make it Antelope Canyon.
Antelope Canyon – Upper vs Lower
The Antelope Canyons are split into the upper and lower section, with the upper being more expensive and crowded because of the light rays and the opportunities to photograph sand falling into the canyon.
The lower section has fewer people (still crowded) and is generally cheaper, and the canyon itself descends deeper (more stairs). We went for the lower section to save some money and had a great time.
Do note that you will need to join a tour to enter the Antelope Canyons, you do not have access to them on your own. I booked my tour for $50 USD per pax with Ken’s Tours for 1-1.5 hours. One advantage of having a tour is that the guide might show you good photo spots and help you take pictures.
Book your Antelope Canyon tour for the best experience
You can also browse more Antelope Canyon tour options on platforms like GetYourGuide, such as:
Alternatively, consider this variation of the Grand Circle tour from Las Vegas: Antelope Canyon + Horeshoe Bend day trip from Las Vegas
Best time slot for photos
Also consider the time of day you choose for the tour, as you want to have optimal sunlight shining into the canyon. Most sources say that mid-day is the best. If it is too late in the day, the canyon could look dark in pictures.
Overall a very fun place to explore and take pictures in, but the crowd makes it difficult to take good photos and you might feel rushed.
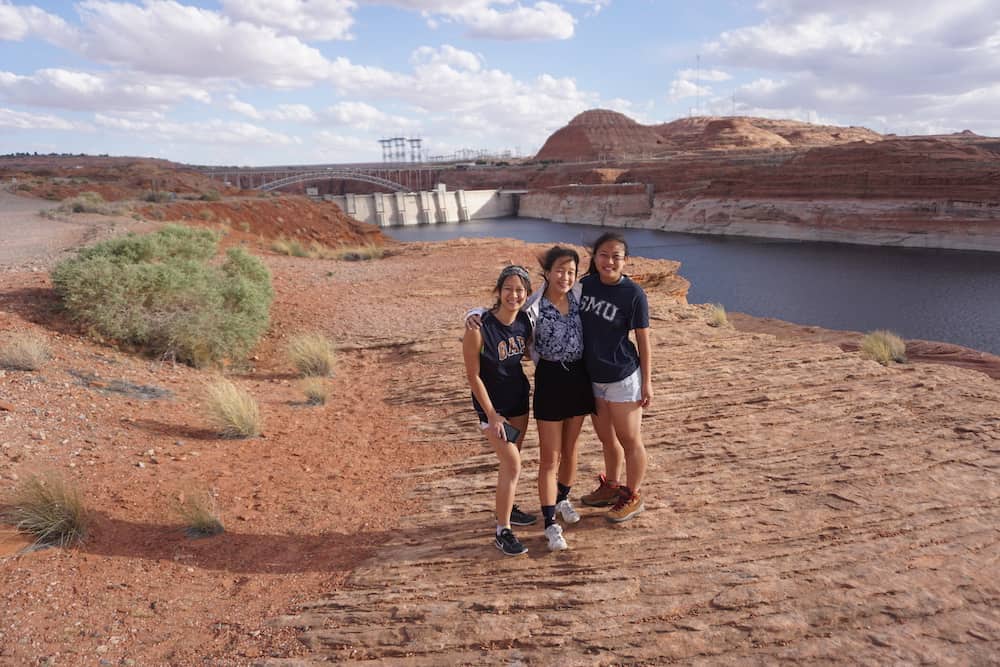
Horseshoe Bend
In between our mid-day tour to Antelope Canyons and sunset viewing at Horseshoe Bend, we bought frozen yoghurt in the nearby supermarket to cool off. Then, we headed to the Glen Canyon Dam nearby where The Chains hike starts. We chose to stay near the parking lot, exploring rock formations and taking pictures. It was unexpectedly fun, and you can even see people fishing and going really close to the water.
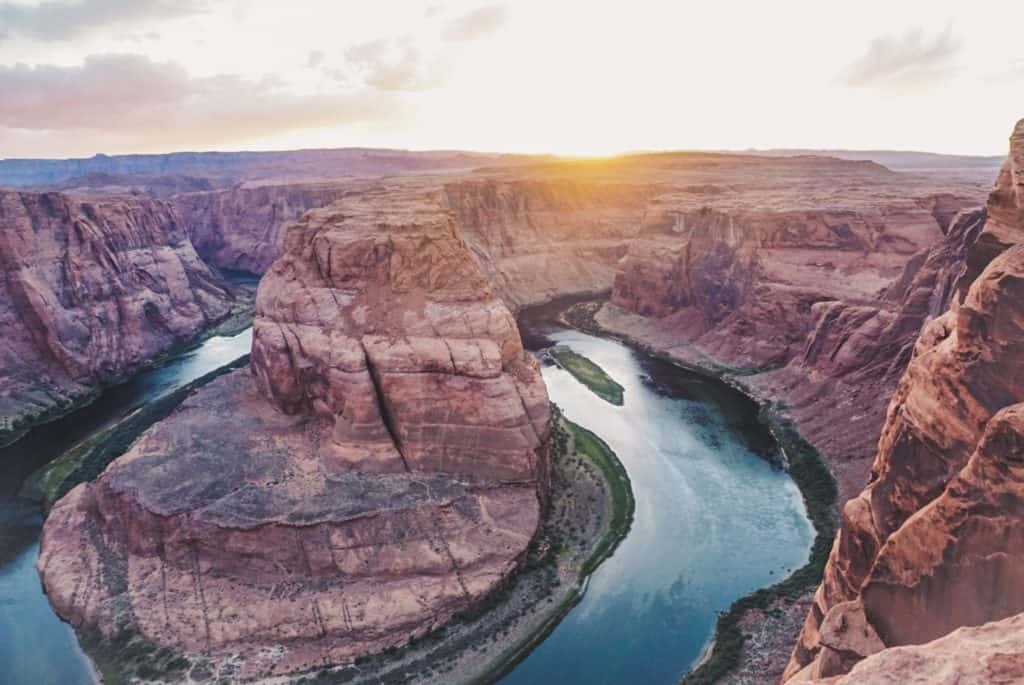
Last but not least, a beautiful sunset to end the day. Aim to arrive at the observation area about 1 hour before sunset so that you can enjoy golden hour. You can also watch the colours of the sky change if you stay a while after the sun sets.
On hindsight, I should have brought some picnic mats/towels to put on the rocks for a more comfortable sunset experience.
Where to stay near Antelope Canyon and Horseshoe Bend
You can stay in Marble Canyon Lodge, which has comfortable and affordable rooms looking out to the Vermillion Cliffs. I love that the night sky is super dark, and it’s a great place for astrophotography along Lees Ferry Road. This is also the gateway to the Grand Canyon.
Do note that in Arizona there is time difference in the Navajo Nation regions, which includes Tuba City. The rest of Arizona follows Pacific Time.
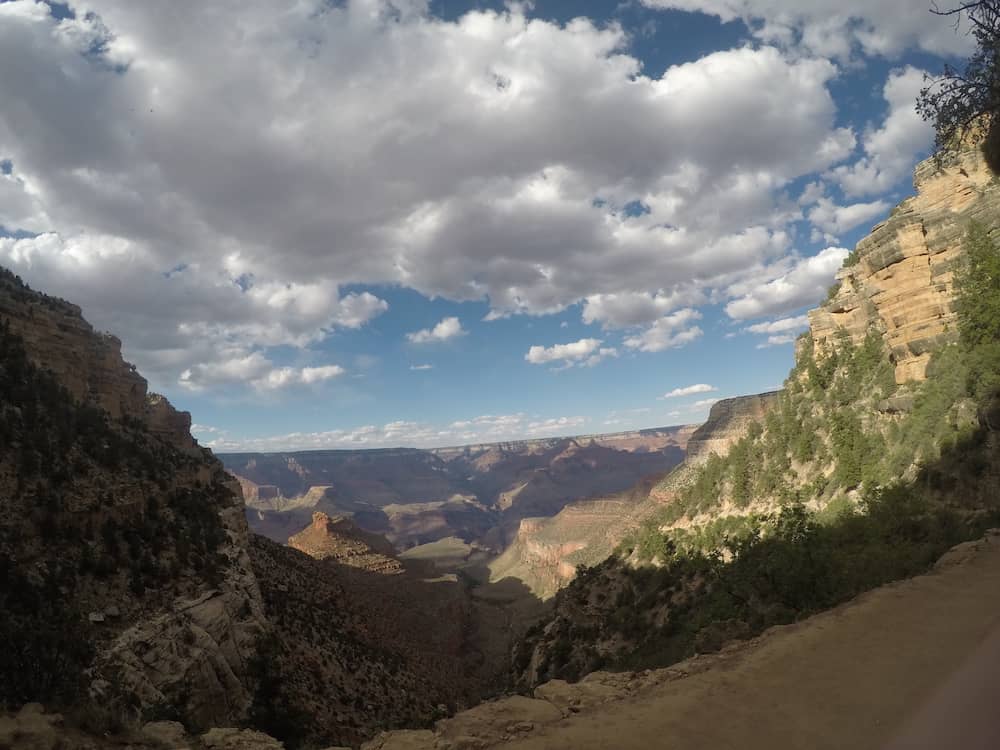
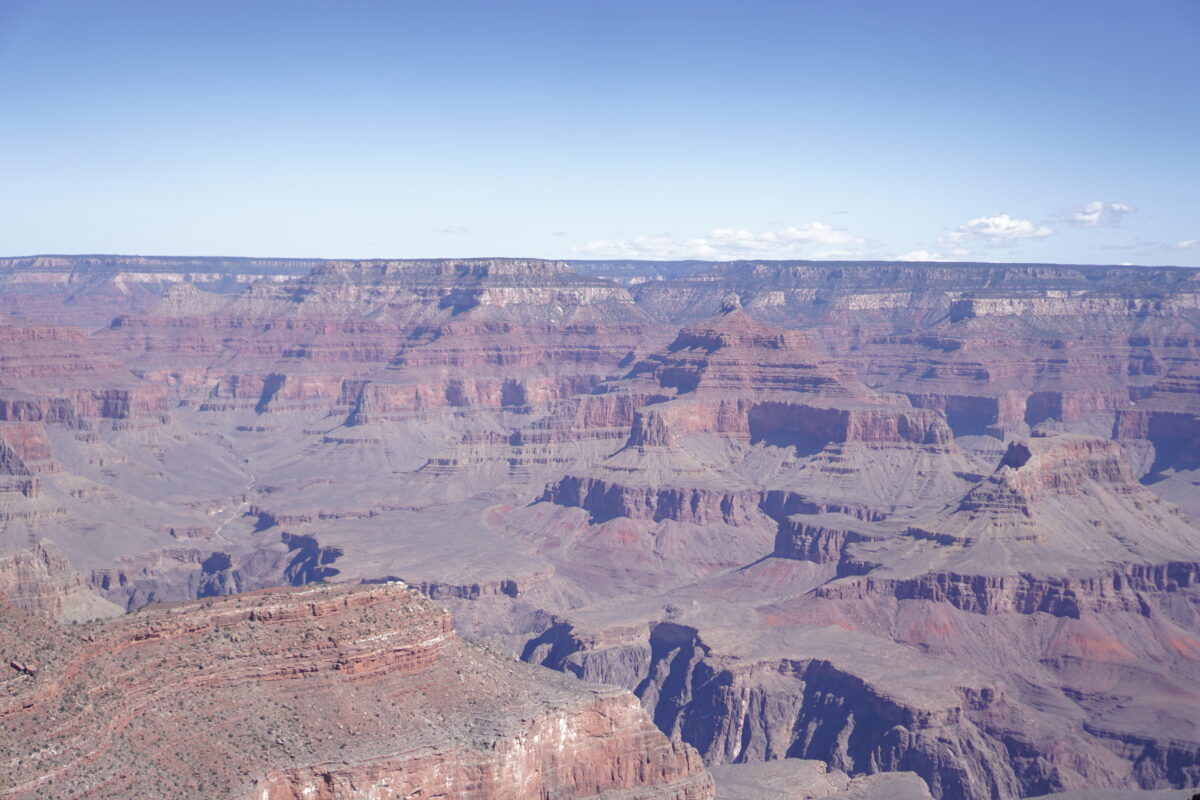
Day 5: Grand Canyon National Park (South Rim)
This is probably where you will find the ‘Grand’ in the Grand Circle road trip. Our family camped 1 night in Grand Canyon National Park (Mather campground), giving us plenty of opportunities to enjoy the park. After all, it is one of the wonders of the world, a geographical landform visible from space.
We rented camping equipment from Airbnb and collected them in Cameron, AZ on our way to Grand Canyon.
If you’re looking for buy camping gear, this tent is fairly affordable for beginners. Since its gets cold at night, don’t forget to pack warm sleeping bags and insulating sleeping pads. As a comfort item, I love these camping chairs that pack down really small.
Best lookout points in Grand Canyon National Park
There are many lookout points in the park, and here are the ones I visited and recommend. You can also find a summary of these places, including sunrise and sunset spots color-coded in this map below.

1) Along east entrance, with views of the Colorado River:
- Desert View
- Lipan Point
2) Near the village and Mather campground
- Mather Point/Amphitheatre (sunrise views, closest to campsite and has seating area)
- Rim trail views
3) West of the village along Hermit Road (accessible only by shuttle bus from Mar-Nov)
- Hopi Point (sunset views, toilets available)
- Would have also gone to Mohave Point for sunset if we had more time
Most people also recommend hiking the South Kaibab trail (near the east side of the park). However, we chose another trail called the Bright Angel Trail, and hiked down to the Mile-and-a-Half Resthouse. The round trip hike takes 2-4 hours with 1,120 ft (340 m) elevation gain. This trail would be closest to Hermit Road where we will be going for sunset.
Where to go for sunset?
- Hopi Point (red route)
- Yavapai Point (drive, walk or orange route)
- Lipan Point (drive)
- Pima Point (red route)
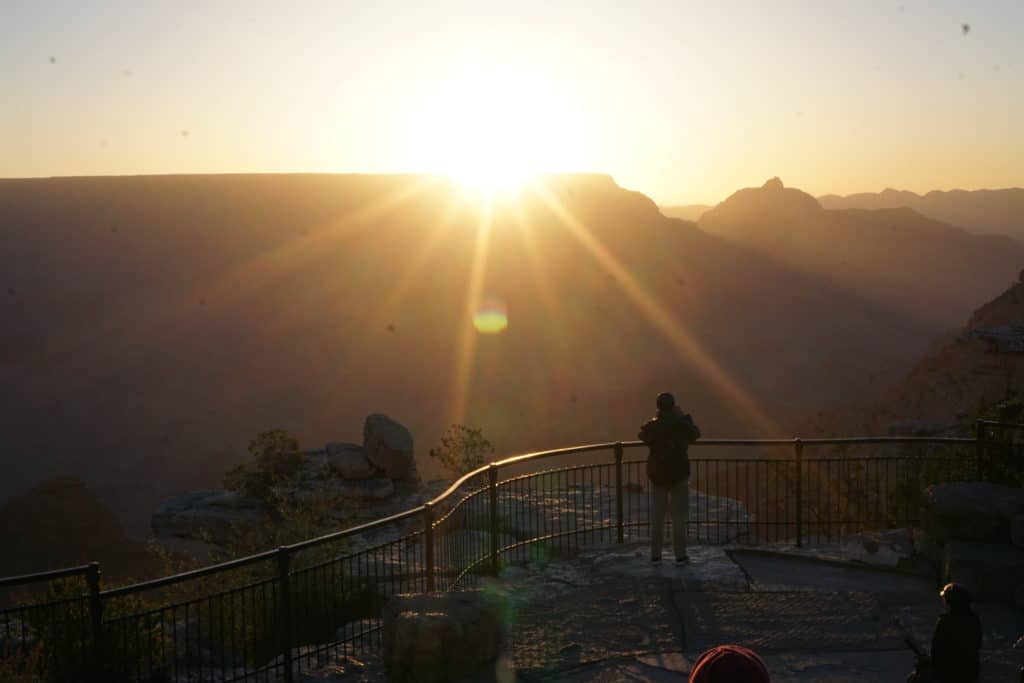
Day 6: Grand Canyon, Las Vegas
As mentioned earlier, Mather Point is one of the best places to watch the sunrise (shown in the picture above). We also happened to meet 2 other Singaporeans and they were smart enough to bring coffee and breakfast along.
Where to go for sunrise?
- Yavapai Point (Walk, drive or orange route)
- Navajo Point (Drive)
- Hopi Point (red route)
- Mather Point (5 minute walk)
Sunrise tips: arrive at the lookout point about 30-45 min before sunrise to watch the light slowly creep in. The photo shows the sun after it has risen. We woke up at 4:45am and waited till about 6am before leaving. Sunrise time was about 5:30am.
Cook some ramen and drink some coffee before starting the day. Head out to explore the Rim Trail to see more viewpoints of the Grand Canyon before driving to Las Vegas.
We passed through several towns and dropped by Williams to return the camping equipment. There was some decent coffee at Brewed Awakenings Coffee.
To end the day, we pigged out at a buffet place. It was perfect after many days of hiking. You could choose to watch a live show after dinner too, or simply walk around exploring the many hotels/the Strip.
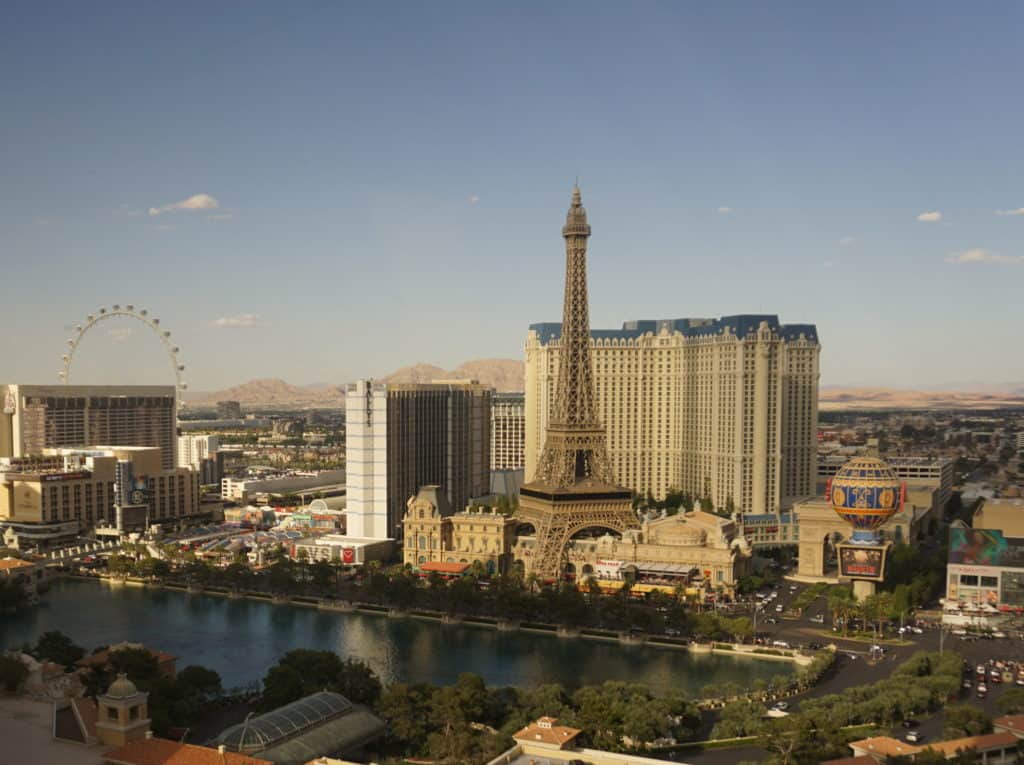
Day 7: Leave from Las Vegas
On our last night in Vegas, we and booked a room in Bellagio Hotel to reward ourselves.
If you can wake up early, spend some time in the hotel pool area to soak in the sun. Spend this last day shopping at the outlet stores too. We shopped at the South outlet stores since it was nearest to McCarran airport and the car return area.
The time of the year to go to these places could play a role in several decisions. For example, camping at freezing temperatures and deciding which trail to hike as some might be closed due to snow. However, many of these places look spectacular with snow sprinkled on them, and not everyone gets to enjoy such view. I would love to visit Capitol Reef National Park and Monument Valley if we had more time.
With that, the perfect Grand Circle road trip has concluded. I hope that this has helped you in planning and getting inspired to hike a little. You can also check out these tips on how to take great photos of yourself hiking. Now let’s get packing!
What to bring hiking during your Grand Circle road trip
To make the most of your adventure, it’s essential to come prepared. Here’s a checklist to ensure you have everything you need.
Hiking essentials and comfort items
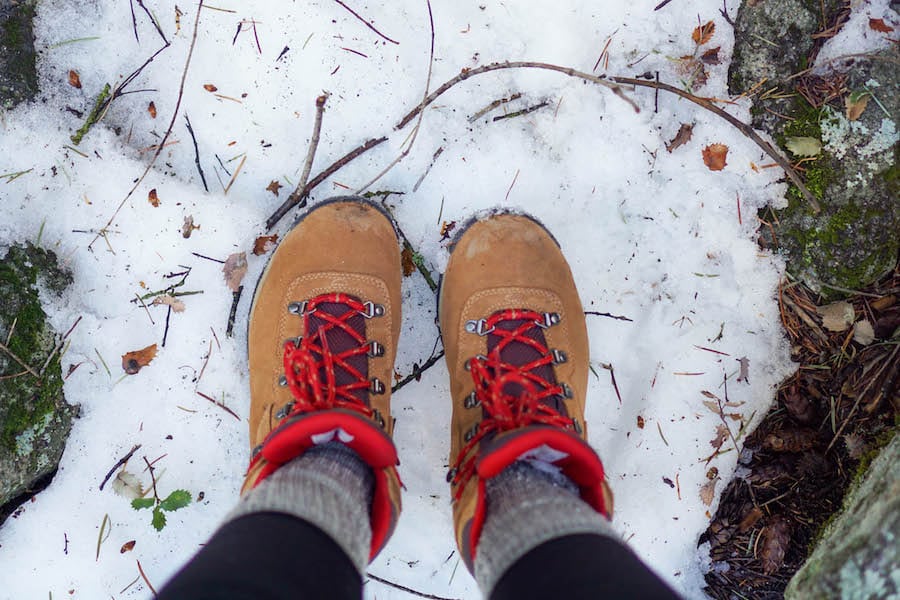
- Hiking boots or shoes: Comfortable and supportive footwear is a must so you’ll have the best experience. Waterproof boots can be useful for muddy trails.
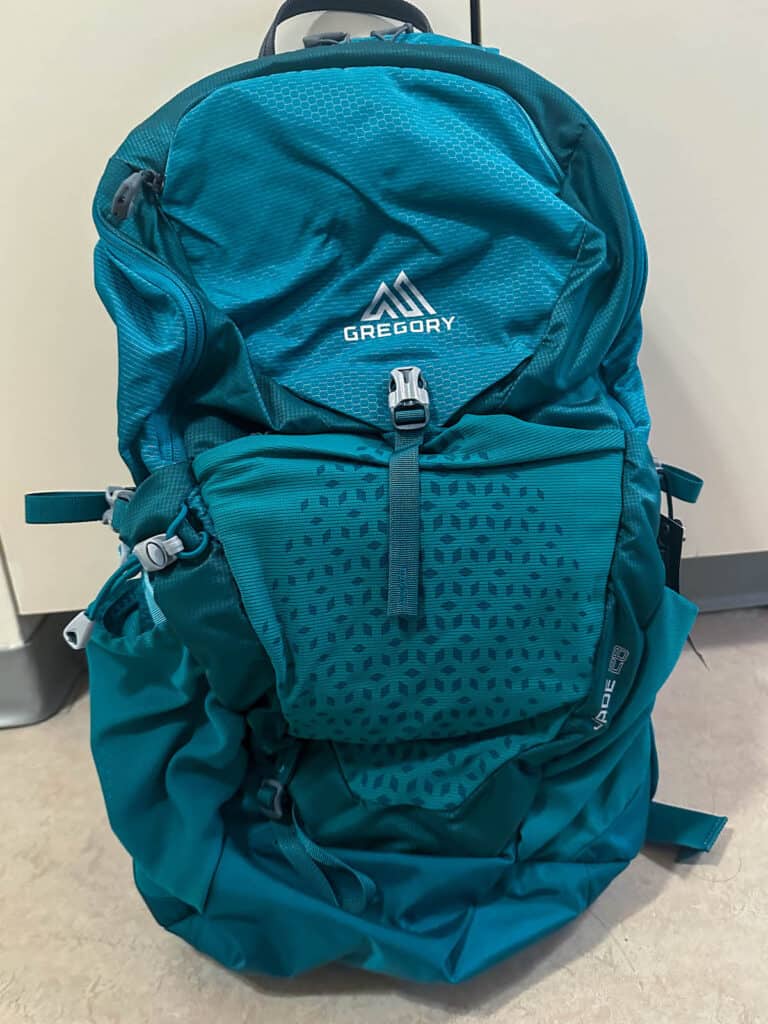
- Hiking day pack: It should have enough space to store snacks, water, and any extra clothing. Here are some affordable hiking backpacks below $100 to consider.
- Water: Stay hydrated, especially during warmer months. Water reservoirs with up to 3-litre capacity are useful for longer hikes. In general, bring at least 0.5 litres for every hour of hiking.
- Map and navigation: Having offline trail maps adds an extra layer of security. Offline Google Maps also helps.
- Snacks: Pack energy-boosting snacks to keep you fueled throughout the hike. These could be energy bars, nuts, or some sweets.
- Sun hoody: This UPF 50+ sun hoody is very breathable, comfortable, and blocks her 98% of UV from reaching your skin.
- Sunscreen and cap: Protect yourself from the sun, especially during the open sections of the trail.
- Layered clothing: For example, bring a fleece sweater and wear a sweat-wicking base layer. Rain jackets can also act as a windbreaker.
- Camera
- Phone tripod: If you’re hiking alone, having a phone tripod is great for filming shots of yourself.
- Trekking poles: Provide extra stability on uneven terrain and downhill sections.
Shop hiking gear
A reliable hiking day pack for carrying essentials – even comes with a rain cover.
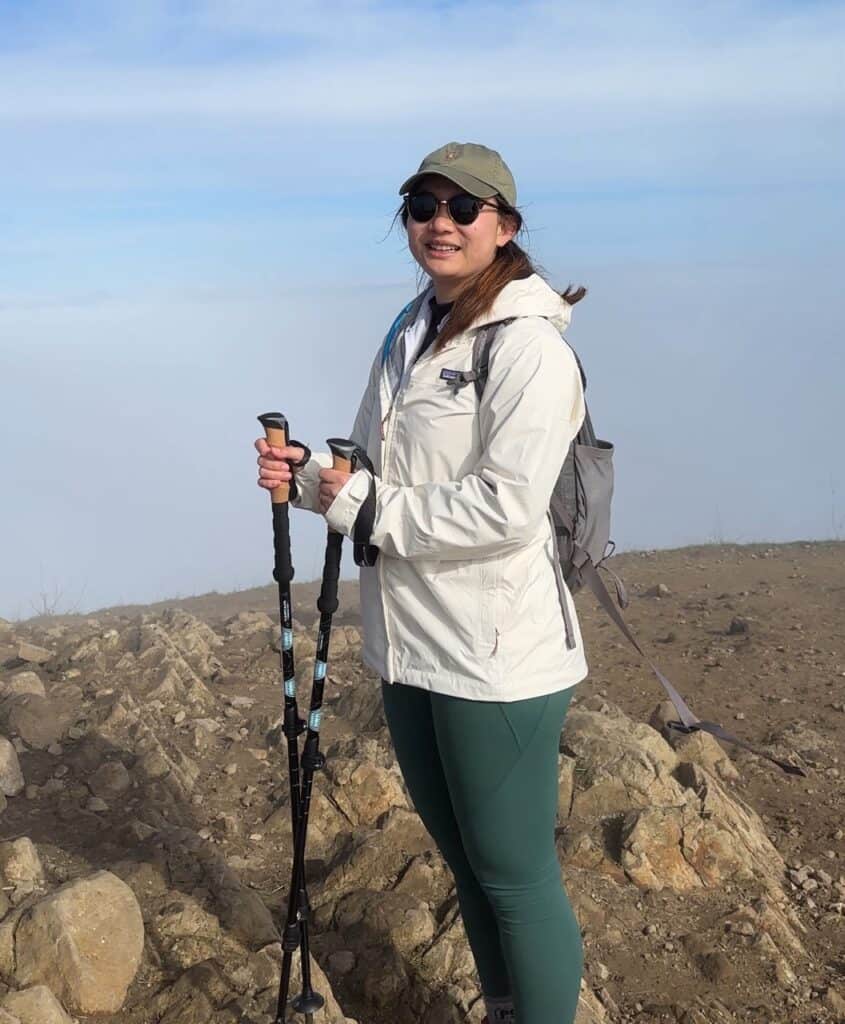
Patagonia Torrentshell 3L Rain Jacket
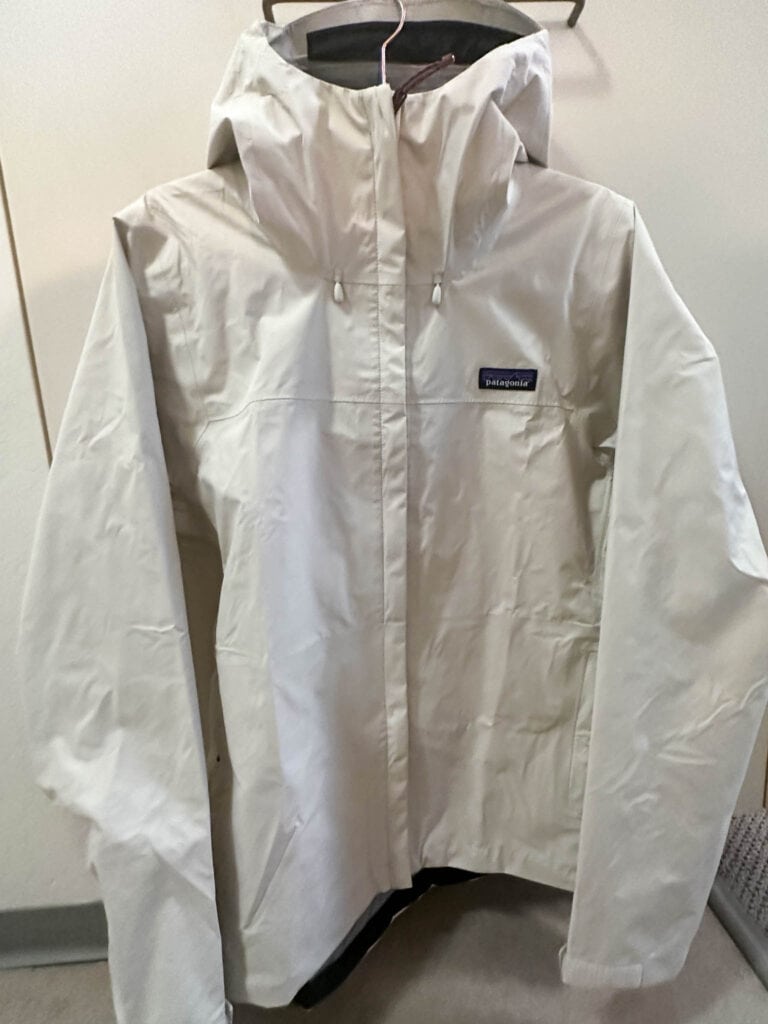
Keep dry and comfortable with a reliable waterproof jacket for unpredictable weather.
Cascade Mountain Tech Trekking Poles
Lightweight hiking poles that support you both uphill and downhill.
Columbia Benton Springs Full Zip Fleece
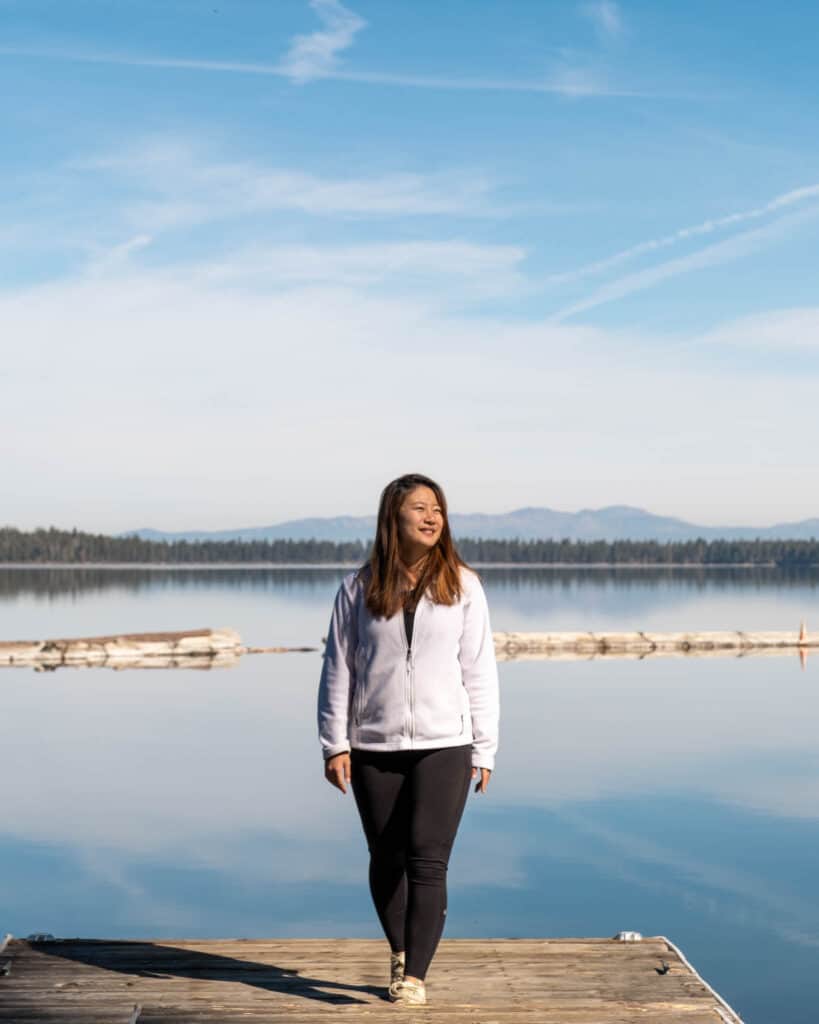
Insulating mid layer fleece that repels water and keeps you warm.
Going hiking or camping soon? Check out some of my tips and gear recommendations:
Cold weather camping gear | Camping starter kit | Affordable hiking backpacks | Weekend camping trip planning + packing list | First-timer tent camping tips | Hiking boots for women | Rooftop tents for car camping
FAQ: 1 week Grand Circle Road Trip
Planning a Grand Circle road trip in just seven days can feel overwhelming, so here are answers to the questions I get asked most often.
Is 7 days enough for the Grand Circle?
Yes! You can see all the highlights in a week if you plan smartly. With this itinerary, you’ll hit the Grand Canyon, Zion, Bryce Canyon, Antelope Canyon, and Horseshoe Bend without feeling rushed. The driving days are manageable, hikes are family-friendly, and there’s minimal backtracking. It’s perfect for a one-week loop starting and ending in Las Vegas.
Should I include Moab in a 1 week Grand Circle trip?
If you only have seven days, I’d recommend skipping Moab. It’s a fantastic area, but adding it would mean extra driving and less time to actually explore the parks near Las Vegas. For a short trip, sticking to the parks closest together makes for a more relaxed and enjoyable experience.
How can I make this a longer trip?
If you have more time, you can stretch this loop to 10–14 days. That gives you room to add parks like Capitol Reef, Canyonlands, Arches, or Monument Valley, plus more hiking and sightseeing without rushing. A longer trip also lets you take scenic detours, spend extra nights in the parks, or just enjoy more downtime along the way.
Read more:
10 Reasons You Should Use Notion for Travel Planning with Friends
DIY Finland Road-Trip: Lapland in Autumn For Best Northern Lights
Like this post? Pin it!


This was really helpful – thank you so much!