
10 Best Tips: How To Camp in Yosemite’s Camp 4
Camp 4 is not your typical Yosemite Valley campsite. It’s a little bit more like a hostel, but camping style.
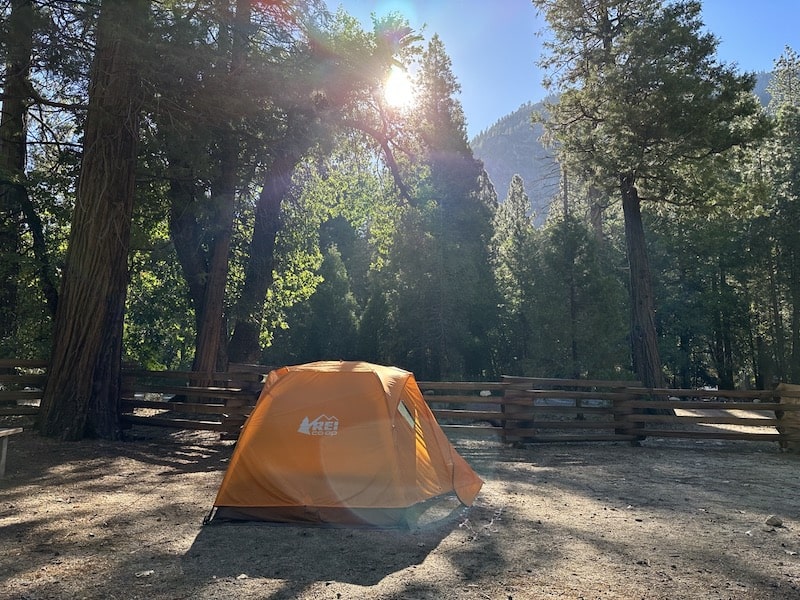
During our trip to Yosemite, we used Camp 4 as our base for exploring the park. It was during late summer and we were so thankful to have a place to stay in Yosemite Valley.
You may be wondering, “How do you even get a site at Camp 4?”
“How different is it from the usual campsites at National Parks?”
In this article, we will talk about what you should and should not do, and some tips when camping in Camp 4. You can also check out this video about our Yosemite trip where we stayed in Camp 4.
1. Check if you need a reservation for Camp 4
Don’t assume camping at Camp 4 is on first-come first-served basis. Recently, they started requiring reservations during the summer season. In any case, you can check on reservation requirements for Camp 4 on recreation.gov.
In 2023, reservations were required for Camp 4 from May 21 to Sep 30. That means you will need to compete with a hoard of other people on who has the fastest clicks. After all, Camp 4 has a unique and cherished history associated with climbing and lots of people want to stay here.
Camp 4 was actually expanded in 2021 to increase the number of tent-only campsites from 36 to 61. Each campsite is then allocated to 6 people.
So, is it hard to get a campsite at Camp 4? With or without the reservation system, it can be really difficult especially during the peak season.

2. If reservations are required, set a reminder for the booking day
If you need to make reservations in advance, make sure to set a reminder and wake up early to participate in this clicking challenge. The campsites are typically available for booking 1 week in advance at 7am.
We attempted a reservation for both of us at Camp 4 on two different weeks. I was very surprised by how quickly all the slots got taken up during our first attempt.
It can be a little bit discouraging, but don’t lose hope! You can try this for as many weeks as it takes.

Step-by-step guide to making a reservation at Camp 4
Thankfully, we managed to get a booking done during our second attempt.
Here is a step-by-step breakdown of what we did:
- Prepare camper’s names, vehicle registration plate number, and credit card
- Keep time.gov open for reference
- At 6:45am, open different browsers (Safari/Chrome/Firefox) for the next steps
- Prepare the reservation page on each browser
- Select the dates (up till the date that’s going to be released, subject to prior dates’ availability)
- Click add to cart just as the time changes to 7am
If you are successful at this stage, you will be asked to input the details you prepared in Step 1. Otherwise, stay online and follow the next few steps:
- Stay on the reservation page and refresh in roughly 5 minute intervals after 7am (carts expire in 15 minutes if no action is taken)
- Click “add to cart” once you see a number on the selected date, indicating the number of available spots
It may take a few tries and refreshes to successfully reserve a site. For us, we saw 2 slots open after 15 minutes, but still failed to add to cart. After another 5-10 minutes, 6 slots opened up and this time we managed to book them!
After maybe about 30 minutes, it may be better to give up and try again another week. Alternatively, look around other campsites to see if there are any cancellations that you can take advantage of early in the morning. In fact, that’s how we got our last-minute campsite at Lassen Volcanic National Park.

Checking in at Camp 4
Once you arrive in Yosemite, you can check in at the ranger station from 8:30am onwards. They will need your ID for verification, and then they will tell you which site and food lockers to use. You will also receive a Camp 4 parking permit and a date-specific tag for your tent.
The previous occupants will leave by 12pm (check out time), so you can plan some morning activities before you set up camp.

3. Get in line early in the morning for walk-in campsites
If you see “FF” status on the reservation page, it means that they are on first-come first-served basis. However, there is no guarantee of you being able to camp here.

The best thing to do would be to get in line at the Camp 4 ranger’s station early in the morning. Although the ranger only gets to work at 8:30am, people have been known to start waiting from 5am onwards. Some have even slept overnight in the waiting line.
However, I believe it should be easier to get a campsite during the shoulder season (approximately December to March). Of course, do make sure that you have adequate cold-weather camping gear.
If you’re travelling in winter, check out some fun things to do in Yosemite in this off-peak season. This winter Yosemite itinerary will also help you to plan out a fun day in the valley.
4. Stay minimal and bring wheels
Congratulations! Now that you have a campsite secured, you should know that Camp 4 is considered a “walk-in” site. That means the parking lot will be walking distance away from your campsite, rather than right next to it.
There are some wagons provided to help you transport your camping equipment from the parking lot to your campsite. However, they are not always available as other people may be using them. In that case, it may be better to have your own trolley or wagon.
Of course it’s also possible to make multiple trips from the car to the campsite, which was what we did. It is just a little bit more tiring, so you can consider packing minimal equipment if possible. For a guide on things to bring to Yosemite, check out this article.
Read more:

5. Arrive early to get parking
The parking lot that is designated for use is a Camp 4 only site. You can find it sandwiched between the 2 sections of Camp 4. As Camp 4 is located in the heart of Yosemite Valley near the Upper Falls, Valley Loop and Four Mile trails, parking can be competitive. There’s a chance that people who don’t have reservations will try to park here especially when the park gets busy.
We noticed that in the late morning there were people who had reservations but could not find a spot. It’s also possible that the previous campers have not left the parking lot. That means there could have been an overlap of arrivals and departures.

6. Take the shuttle to get around
After you’ve parked, it’s best to leave your car and take the free Yosemite Valley shuttle to get around. This saves you the hassle of having to find parking at various parts of the park.
One of the advantages of staying at Camp 4 is that there is a shuttle stop nearby at Yosemite Valley Lodge (stop #7). The shuttle service runs from 7am to 10pm daily, every 12 to 22 minutes. This makes it a convenient mode of transportation within the valley.
There are also a few tours that start and end at Yosemite Valley Lodge. Check out the Glacier Point tour bus and Hikers’ Bus that goes to Tioga Road.

You can also take the shuttle to return to camp after hiking at Mist Trail (stop #16) or dining at Degnan’s Kitchen (stop #4). Boarding the bus at stop #7 also brings you to El Capitan Picnic Area (#8).
To get from Camp 4 to Mist Trail, you’ll need to walk to the shuttle stop at the Four Mile Trailhead (stop #11). If you’re starting your day early, you can also consider walking to the trailhead instead.

7. Bring trash bags and a portable basin
If there’s one thing I need to tell you – it’s that being bear safe is very important.
That means that you should keep all your food and scented items strictly in the food lockers. None of it should be in your tent or car.
You should also be careful about trash and food waste disposal. That’s because any remnant food scraps at your campsite may attract wildlife including bears.
Since there isn’t a dumpster near most of the campsites in Camp 4, you should prepare a trash bag to collect your trash. After that, dispose of it at the bear-proof trash bins.
As for cleaning up, if you’re not near the washroom you may not have access to running water nearby. One solution is to get a portable sink or basin. It can hold water for washing dishes and helps to contain food scraps. The food scraps can then be disposed of properly together with the rest of the trash.
8. Campers can shower at Camp 4
Firstly, Camp 4 does have bathrooms on both east and west sides, as you can see from the map from earlier in the post.
During check-in, the ranger told us that the showers at Camp 4 are free of charge for campers. You can find them on the east side of the campground beside site #46 outside the main bathroom. There may be a waiting time due to limited stalls.
If you’re planning to shower, do bring flip flops so you don’t need to stand barefoot on the ground. In addition, you can consider bringing a chair/stool for your things in case the bath stalls lack hooks.
Another tip would be to use the bathrooms earlier in the day. That’s because most people also wash up in the evening, so it gets much dirtier after a day. I didn’t get a photo of the shower stalls, but here’s what the bathroom looked like in the morning.


9. Keep your valuables and loose items out of sight
Our camp chairs were stolen the morning after.
We were quite sad, mostly because we always thought that National Parks are relatively safe. However it didn’t really make sense for some cheap Amazon chairs to get stolen.
So here’s a quick word of caution – keep your valuables with you, and loose items out of sight.
One of the disadvantages of staying at Camp 4, especially on the east (newer) side is that there can be a lot of people passing through. That may be because it is located between the Upper Yosemite Falls Trail and other walkable parts of the valley like Yosemite Lower Falls and the Valley Loop Trail.

If you’re staying near the bathroom, your site may become hotspot for loitering. Since we stayed at site #50, we noticed that people frequently sat at our picnic tables to rest after using the bathroom.
We guessed that our lightweight camp chairs became easy targets because the big group we were with had packed up and left. I also saw stories online about how propane tanks and climbing gear have also been targets for theft here.
At least now we know better to not be complacent.

10. Get ready to share your campsite with strangers
This is not a quiet campsite. I repeat, this is not a quiet campsite.
The campsites are quite close to each other, on top of the fact that each campsite is shared by 6 people. You will be sharing the picnic tables, fire pit and food lockers, which can also be a good experience if it helps you meet new people.
We shared our campsite with a group of 10, which meant there were 4 on our site and 6 on the adjacent site. We could hear our neighbors talking around the fire even after the quiet hours (10pm onwards). If you’re hoping to have an early night or are a light sleeper, you may need to bring earplugs.
Aside from that, they were respectful and gave us ample space on our campsite. It was actually quite nice to have a lively group with us, as it felt very much like a hostel-style camping experience. They also told us we could go swimming in the Merced River, which was something we had not considered.

Additional tips and FAQ about Camp 4
How many cars are allowed in Camp 4?
Although it doesn’t explicitly say so on the National Parks Services website, I’m guessing that each group can bring a car.
Even though the campsite is for up to 6 people, it’s possible that 6 different individuals got assigned to that campsite. That’s why I don’t think the usual “2 cars per campsite” rule applies here.
Regardless, if you need any assurance, we were 2 people and we brought 1 car. We just had to indicate our car plate number in our reservation for them to track permits.
Is there cell service in Camp 4?
Cell service is intermittent in Camp 4, but we didn’t have any major interruptions in our mobile usage. We used T-Mobile when we were at Camp 4, so yay for all those real time Instagram updates!
Read more:
- How To Get Started Tent Camping: Simple Tips for First-Timers
- How To Hike Sentinel Dome: The Best Yosemite Sunset Photography
- How To Choose The Best Places To Stay At Yosemite
- The Ultimate 10-Day Road Trip You Need: Best Of Highway 1, Yosemite, Lake Tahoe
- 5 Best Places In Northern California For Stunning Winter Camping


