

10 California Backpacking Trips You Need To Try In 2026
If you’re searching for the best backpacking trips in California, it can quickly feel overwhelming. There are so many trails, and not every route is beginner-friendly. Thankfully, California is one of the best places to get started. From alpine lakes to granite peaks and rugged coastlines, you have so much variety. In some areas, you could even backpack in winter.
I’ve been backpacking in California for the past couple of years, mostly on weekend trips from the San Francisco Bay Area. We normally choose beginner-friendly 2–4 day routes with manageable drive times, straightforward logistics, and big scenery.
In this guide, I’m sharing some of the best California backpacking trips and tips on how to prepare so you can feel confident hitting the trail. Whether you’re a seasoned backpacker or completely new to the trail, these are some of the best California backpacking trips worth adding to your list.
Not sure what to bring, or don’t want to backpack alone? A guided California backpacking trip takes care of the gear, food, and planning. You just show up, enjoy the trail, and meet new people who love the outdoors.
🏕 Check out upcoming trips here – use code “wheresjanice50” for $50 off!
This article uses affiliate links where I make a small commission if you make a purchase through my links, at no additional cost to you. As an Amazon Associate I earn from qualifying purchases.
What are the best California backpacking trips?
Below is a list of California backpacking trips that I’m personally planning and excited about. I’ve included the suggested duration, best time to go, and difficulty level for each trip so you can quickly decide which ones are right for you.
Essential gear for California backpacking trips
If you’re planning your first backpacking trip in California, here’s the minimum gear you’ll want dialed in before picking a route:
🎒 Backpacking pack (50–65L)
🏕️ Backpacking tent
🛏️ Sleeping bag (20–30°F rating)
🔥 Compact backpacking stove + fuel
💧 Water filter or purifier (critical for most routes)
🐻 Bear canister (required in Yosemite, Tahoe, Big Pine Lakes)
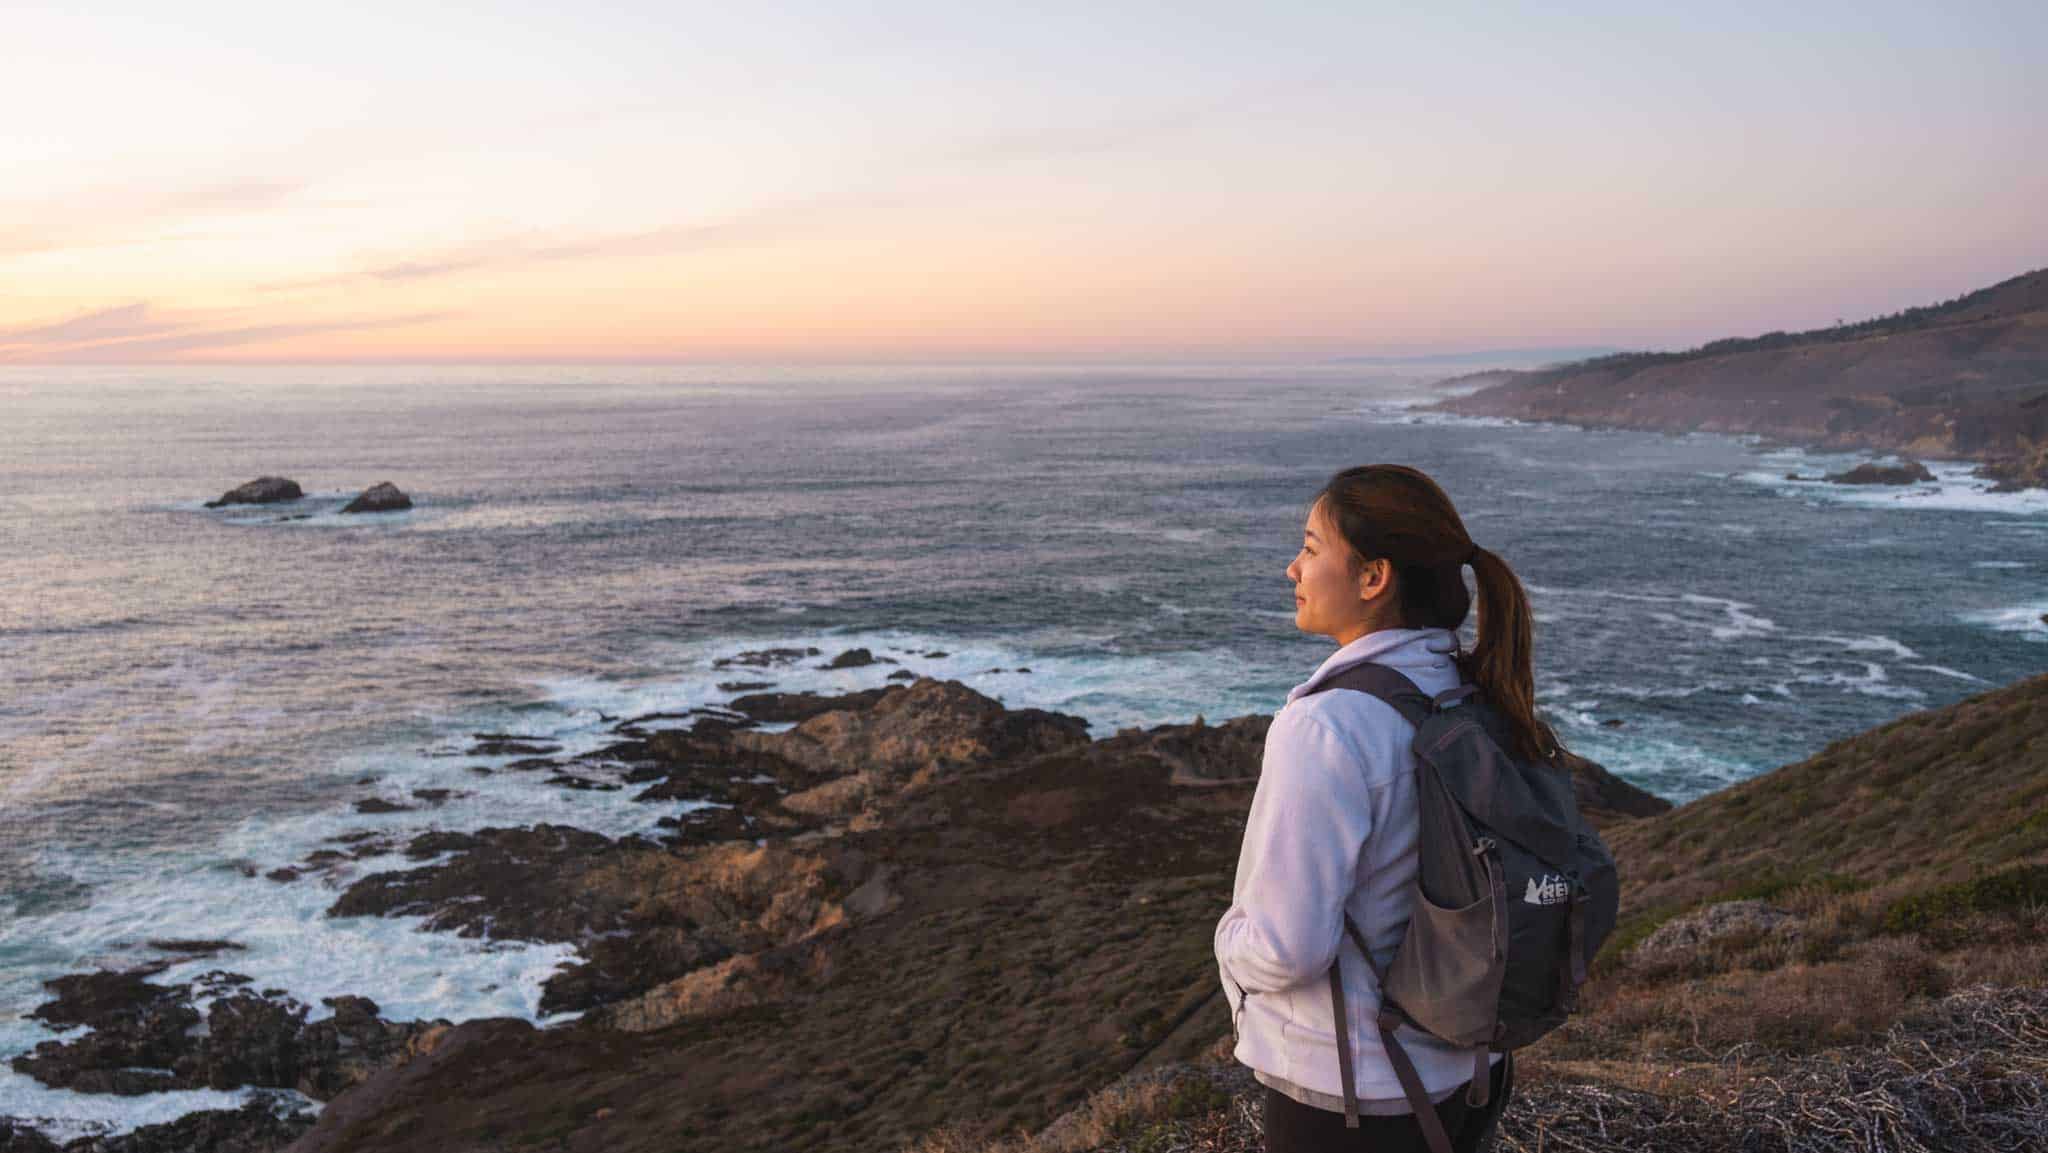
1. Lost Coast Trail
The Lost Coast Trail is on the bucket list of many backpackers, and rightly so! Located north of San Francisco in Humboldt County, this trail follows the rugged coastline of the King Range and offers some of the most remote scenery in California.
Since there are no roads cutting through this stretch of coast, backpacking is the best (and only) way to experience it. Most hikers take 3–4 days to complete the full trail.
Browse Trail Availability
What you need to know
- One of the important things to plan is the tide timing you will be walking on the beach as some parts of it will be submerged during high tide.
- As it is a point to point trail, you might need to hitch a ride/book a shuttle in advance/bring 2 cars and leave one at each end. Do note that the driving distance is about 2 hours.
- A popular way to start is from Mattole River Beach, hiking southwards to end at Black Sands Beach near Shelter Cove.
- Permits are required to camp in King Range Wilderness. They are available 3 months in advance at 7am, and 2 walk-up permits are available daily. In addition, only 30-60 permits are available each day so it never gets crowded.
- This not a beginner-friendly backpacking trip because of physically gruelling terrain and the amount planning involved regarding tide timings. Expect 1 mile per hour pace while crossing rocky and sandy coastlines.
⚠️ Lost Coast-specific gear tip:
You’ll be hiking on sand and slippery rocks for hours. It’s best to invest in trail runners with good grip, trekking poles for balance, and waterproof pack liners to keep your gear and clothes dry.
Don’t take tide safety lightly — this video from BLM California does a great job explaining what to expect.
Duration: 3-4 days (25 miles)
Best time to go: May to September (open year-round)
Difficulty: Strenuous
2. Point Reyes backpacking

Located slightly north of San Francisco, Point Reyes offers a unique coastal backpacking trip. Wildcat and Coast Camp are the popular beachside campgrounds that you’ll never forget. My first time camping in Point Reyes was during a 10-day California road trip. It was simply amazing to be able to walk out to the beach just a few minutes away to watch the sunset.
Coast Camp is fairly easy to get to, and serves as a great introduction to backpacking. Hiking in to the campsite takes about 30 minutes to 1 hour, and there are several routes you can take to get there. I would really like to check out Wildcat Campground as well, since it’s an excellent base for hiking to Alamere Falls.
You could even spend a few days backpacking in Point Reyes and trying out several campgrounds. The nice thing is that you’re never too far from your car if you need to bail.
Browse Campsite Availability
What you need to know
- Make reservations for the campgrounds in Point Reyes in advance as they are very popular.
- When planning a hike across the beach, make sure to check tide timings.
- Stay alert for sneaky wildlife that try to get to your food, such as raccoons.
- For beginners, I suggest camping at Coast Camp as the hike is shorter than the one required to get to Wildcat Camp. Coast Camp is also closer to other attractions like Point Reyes Lighthouse and Elephant Seal Overlook.
Duration: 2-3 days
Best time to go: April to June (open year-round)
Difficulty: Moderate
3. Trans-Catalina Island Trail

Catalina Island is so stunning that it even featured as a default Macbook wallpaper. Did you know that you can hike across this whole island via the Trans-Catalina Island Trail? It is a unique backpacking adventure in Southern California with amazing ocean views. You can even share a campsite with an American Bison!
My first ever camping trip was actually in Catalina Island, and we camped at Little Harbor. It was such an amazing experience hiking a short portion of the Trans-Catalina Island Trail from Two Harbors to Little Harbor. The view of the campsite from our hike was amazing and I told myself that I’ll have to go back for the whole island someday.
The Trans-Catalina Island Trail is relatively beginner friendly as there are options for you to cut the trip short, such as by heading straight to Two Harbors. In addition, you may be able to rent equipment to some sites. For example, we rented a portable stove and bought firewood to be delivered to our campsite while we were at Little Harbor.
What you need to know
- You will need to take a ferry to Catalina Island from the mainland.
- Campsite reservations are required. Despite the 2-night minimum requirement in summer for certain sites, it can be waived for those on the Trans-Catalina Island Trail. You’ll need to call Two Harbors Visitor Services at 310 510 4205.
- A suggested route is to start at Avalon, camp at Black Jack, continue to Little Harbor campground, then Two Harbors campground, then finally Parson’s Landing and back to Two Harbors. This would be a total of 5 days.
Duration: 4-5 days (38.5 miles)
Best time to go: November to March (open year-round)
Difficulty: Moderate
💡 New to backpacking?
If all this sounds exciting but also overwhelming, you’re not alone. The fastest way to ruin a backpacking trip is bringing the wrong gear, so that’s why..
👉 I put together this beginner-friendly backpacking gear list
4. Yosemite National Park

Yosemite National Park needs no introduction. If you’ve ever been to Yosemite Valley, you’ll know that this is one of the most beautiful places in California. Beyond the granite peaks lie lush meadows, alpine lakes and iconic trails like the John Muir Trail. Yosemite is a backpacking paradise because 95% of it is actually wilderness, and what you see in the valley is just a small part of the landscape.
Popular backpacking trails here include:
- Hike to Half Dome with an overnight stay at Little Yosemite
- Cathedral Lake
- High Sierras Camp Loop
- Vogelsang and Lyell Canyon Loop (Entry point: Rafferty Creek -> Vogelsang)
- Young Lakes via Dog Lake
- Dewey Point (also great for beginner snowshoeing in winter)
Browse Permit Availability
What you need to know
- You definitely need to bring a bear canister and make sure you know all the best practices for keeping wildlife at a distance.
- Wilderness permits are required for backcountry camping.
- Tioga Road and Glacier Point Road which lead to higher elevation areas are typically open during the warmer seasons from May to November.
- Bring a lightweight stove as fire restrictions may apply
🚨 Bear canisters are mandatory, not optional
👉 This is the exact bear canister size I recommend for 2–3 night trips
Duration: Varies
Best time to go: July to October (open year-round)
Difficulty: Varies
5. Lake Tahoe Desolation Wilderness

Discover the pristine beauty of Desolation Wilderness near Lake Tahoe. The trails, often less traveled, lead to alpine lakes and breathtaking vistas. For example, you can spend 3 days and 2 nights camping by Tamarack Lake (zone 41) and Lake Aloha (zone 33). Here’s our Lake Aloha backpacking guide from our trip in summer.
As these lakes are along the Pacific Crest Trail, you’ll get a small glimpse of what it could be like to go thru-hiking. You could even go soak in these hot springs after your backpacking adventure. In winter, consider shorter trails like Eagle Lake where there are designated campsites.
Browse Permit Availability
What you need to know
- Permits are required for the zone you intend to camp, and these are available 6 months in advance. There are quotas up till October so make sure to reserve your permits early, especially for popular zones.
- You definitely need to bring a bear canister and make sure you know all the best practices for keeping wildlife at a distance.
- Make sure to bring microspikes if you’re hiking in early summer as you might have to hike on compact snow which can be slippery.
Winter backpacking gear I recommend:
0-degree sleeping bag
Sleeping pad with 4+ R-rating layered on top of a foam pad with 2 R-rating
Optional: a fleece liner that adds 5-10 F of warmth
Duration: 2-5 days
Best time to go: June to October (open year-round)
Difficulty: Moderate to strenuous
6. Rae Lakes Loop
The 42-mile Rae Lakes Loop in Sequoia & Kings Canyon National Park is one of California’s most iconic backpacking trips. It’s a gradual climb up to Glen Pass which is the loop’s highest point at 11,978 ft. If you’ve done a couple of backpacking trips before, this one could be worth attempting.
I also find it really cool that the Rae Lakes is that both the John Muir Trail and Pacific Crest Trail share the route for one part of the trail, which you’ll cover on day 3. That was probably when I got inspired to downside my backpack as I saw these thru-hikers carrying very minimal weight (and probably having an easier time than me).
Over four days, we camped at different spots each night: Upper Paradise Valley, Middle Rae Lake and Junction Meadow. With 7,800 ft of elevation gain, it’s a challenging but rewarding route with alpine lakes, granite peaks, and stunning wilderness views.
Browse Permit Availability
What you need to know
- Permits are required for this Sequoia and Kings Canyon trail. They are available 6 months in advance at 7am, and walk-up permits are available the day before. For clockwise direction (recommended), choose the Woods Creek entry point, otherwise choose Bubbs Creek.
- You may get altitude sickness so make sure to bring plenty of electrolytes and medication if needed.
- Bears are active here, and it’s compulsory to bring a bear canister.
- There will be creek crossings – I recommend bringing hiking poles and quick-drying trail runners.
- Mosquitoes are crazy in early summer, so you need to treat clothing with permethrin and bring a Picaridin repellent lotion for your face and hands
- Pack light (I personally packed too much weight.. 38 lbs.. and suffered for it)
- There’s plenty of water sources, bring a water filter
Duration: 4 days (42 miles)
Best time to go: July to September
Difficulty: Strenuous
7. Sykes Hot Springs
For a unique backpacking trip, venture to Sykes Hot Springs in the Ventana Wilderness of Big Sur. Sykes Hot Springs is a natural hot spring along the central California coast and requires some effort to get to. The trail you’ll be following is the Pine Ridge Trail which starts from Big Sur Station.
As a reward, you’ll get to check out 3 different pools of hot springs. It does get popular so going on weekdays or early morning is a great idea for getting the hot spring to yourself for a short time. You can also look out for wildlife including salamanders and banana slugs.
What you need to know
- Most people bring a swimsuit to use the hot spring.
- Bring cash to pay for parking at Big Sur Station.
- There are limited amenities along Big Sur, so do prepare anything you need beforehand (such as food from Monterey).
- You need a permit to use a camp stove.
- There are several river crossings required, so be mindful if you are hiking after a period of rain.
- The campsites are on first-come first-served basis with designated occupancy limits. Sykes campground is the most popular as it is close to the hot springs. However if it is full you will need to walk to another campground.
Duration: 2 days (20 miles round trip)
Best time to go: May to October (open year-round)
Difficulty: Moderate to strenuous
8. Big Pine Lakes
The Eastern Sierras are stunning in so many ways. From mountain peaks to alpine lakes, there’s no shortage of backpacking trips in this part of California. I finally got to check it off my California bucket list and we got to see 5 of the 7 Big Pine Lakes.
While it’s possible to do a day hike to the first and second lake, I recommend spending 2 nights here to explore more of the backcountry, including Palisades Glacier. The second lake famously features a view of Temple Crag, which is a pointy rock structure that makes this place look so unique. We base camped here on both nights and enjoyed watching sunrise and sunset against the peaks.
Browse Permit Availability
What you need to know
- Permits are required for the trail, but can be competitive as this is a popular hike. Specifically, this is called Big Pine Creek North Fork. The quota is 25 per day from May to November, of which 15 are available 6 months in advance. The rest are available 2 weeks before.
- The trailhead sits above 7,000 ft elevation, so you might feel short of breath.
- You definitely need to bring a bear canister and make sure you know all the best practices for keeping wildlife at a distance.
Duration: 2-3 days (13 miles round trip for 2 lakes)
Best time to go: July to September
Difficulty: Moderate to strenuous
9. Henry W. Coe State Park
If you live in the San Francisco Bay Area and want a quick backpacking trip that doesn’t require permits, Henry W. Coe State Park is a hidden gem. You can even plan a last-minute weekend trip here and just stop by the visitor center the day of your trip to see what’s available.
In my opinion, here are the best places to camp:
- Mahoney Meadows (dispersed camping)
- China Hole Camp (easy swimming)
- Los Cruzeros Camps
- Ridge View Camp
- Poverty Flat Camps
- Sierra View Camp
What you need to know
- Ticks are known to be an issue in Henry Coe, especially in spring. I recommend treating your clothes and shoes (maybe even gear) with Permethrin. Tuck your shirt into your pants, and your pants into your socks. Wearing light colors helps so you can easily do tick checks.
- Arrive early for best picks on first-come first-serve camping spots
Duration: Varies (most commonly 2 days)
Best time to go: Spring and fall
Difficulty: Moderate to strenuous
10. Mount Whitney
Mount Whitney is a bucket-list hike for many, and for good reason. At 14,505 ft, it’s the tallest peak in the contiguous U.S. A popular way to tackle it is through a 2–3 day backpacking trip, camping along the Mount Whitney Trail so that you can enjoy views of alpine lakes and endless Sierra Nevada peaks.
We personally have not done this even though we got the permits, because we decided to rest after booking too many backpacking trips for the summer. Nonetheless, we had planned to spend 2 nights for Mount Whitney, with both nights at Trail Camp (6 miles from the trailhead).
- Day 1: hike to Trail Camp
- Day 2: summit Mount Whitney
- Day 3: hike back to trailhead
Browse Permit Availability
What you need to know
- Permits are required for overnight trips, but they’re very competitive and even have a lottery process. We finally got ours through permit alert texts provided by Outdoor Status – I highly recommend signing up for this so you don’t stress out over the reservations on release day.
- Watch out for altitude sickness and don’t push yourselves to continue if you’re unwell.
- Bear canisters are required
- You need to use a WAG bag because you won’t be able to dig a cat hole (for human waste)
- Summit before noon to reduce the risk of getting caught in a storm.
Duration: 2-3 days
Best time to go: Summer
Difficulty: Strenuous
Going hiking or camping soon? Check out some of my tips and gear recommendations:
Cold weather camping gear | Camping starter kit | Affordable hiking backpacks | Weekend camping trip planning + packing list | First-timer tent camping tips | Hiking boots for women | Rooftop tents for car camping
Additional Tips on California Backpacking Trips
- Before you go, make sure to learn the Leave No Trace principles. You’ll want to know this as it applies to human waste too!
- It also helps if you have the right camping gear, especially if you’re going somewhere cold or rainy.
- Although backpacking can be a little daunting, it helps if you go on some tent camping trips in developed campgrounds as a start. After that, try backpacking trips that only involve a short hike to build confidence.
- Layering is key so that you can remove layers of clothing before you start sweating excessively through them. Sweat tends to make you feel cold once you stop moving, and moisture wicking base layers will help to manage this. Consider getting merino wool base layers as they are great for warmth even when damp from sweat.
- Pack a set of dry and clean clothes to sleep in.
Planning Your First California Backpacking Trip?
If you’re overwhelmed by permits, gear, and logistics, I’d start simple because backpacking doesn’t have to be complicated. It’s also really get to get the right setup.
👉 Here’s the exact backpacking gear I recommend for California trips
More of my travel guides to help you plan your classic California experience
Lassen Volcanic | Lake Tahoe | Yosemite | Point Reyes | San Francisco Day Trips | Half Moon Bay | Pescadero | Big Sur | Santa Cruz | Monterey | Carmel-by-the-Sea | Catalina Island | Death Valley | 10-day California Road Trip | Rental car tips | Bay Area Must-Visit Places
Not sure where to start? I have some ideas for your California trip!
Best stops along California’s coast | Must-go for outdoor lovers | Best winter camping | Bucket-list backpacking trips | Best SF Bay Area hikes | Best California Glamping | Best beach towns


